Retaining Wall Design and Installation in Gainesville, Georgia
Gainesville’s rolling terrain is one of its charms, but those natural slopes can also create serious challenges for property owners. Heavy rains often cause soil to shift, plantings to wash away, and lawns to develop uneven spots. Without proper support, erosion can undermine a landscape’s beauty — and even damage nearby structures over time.
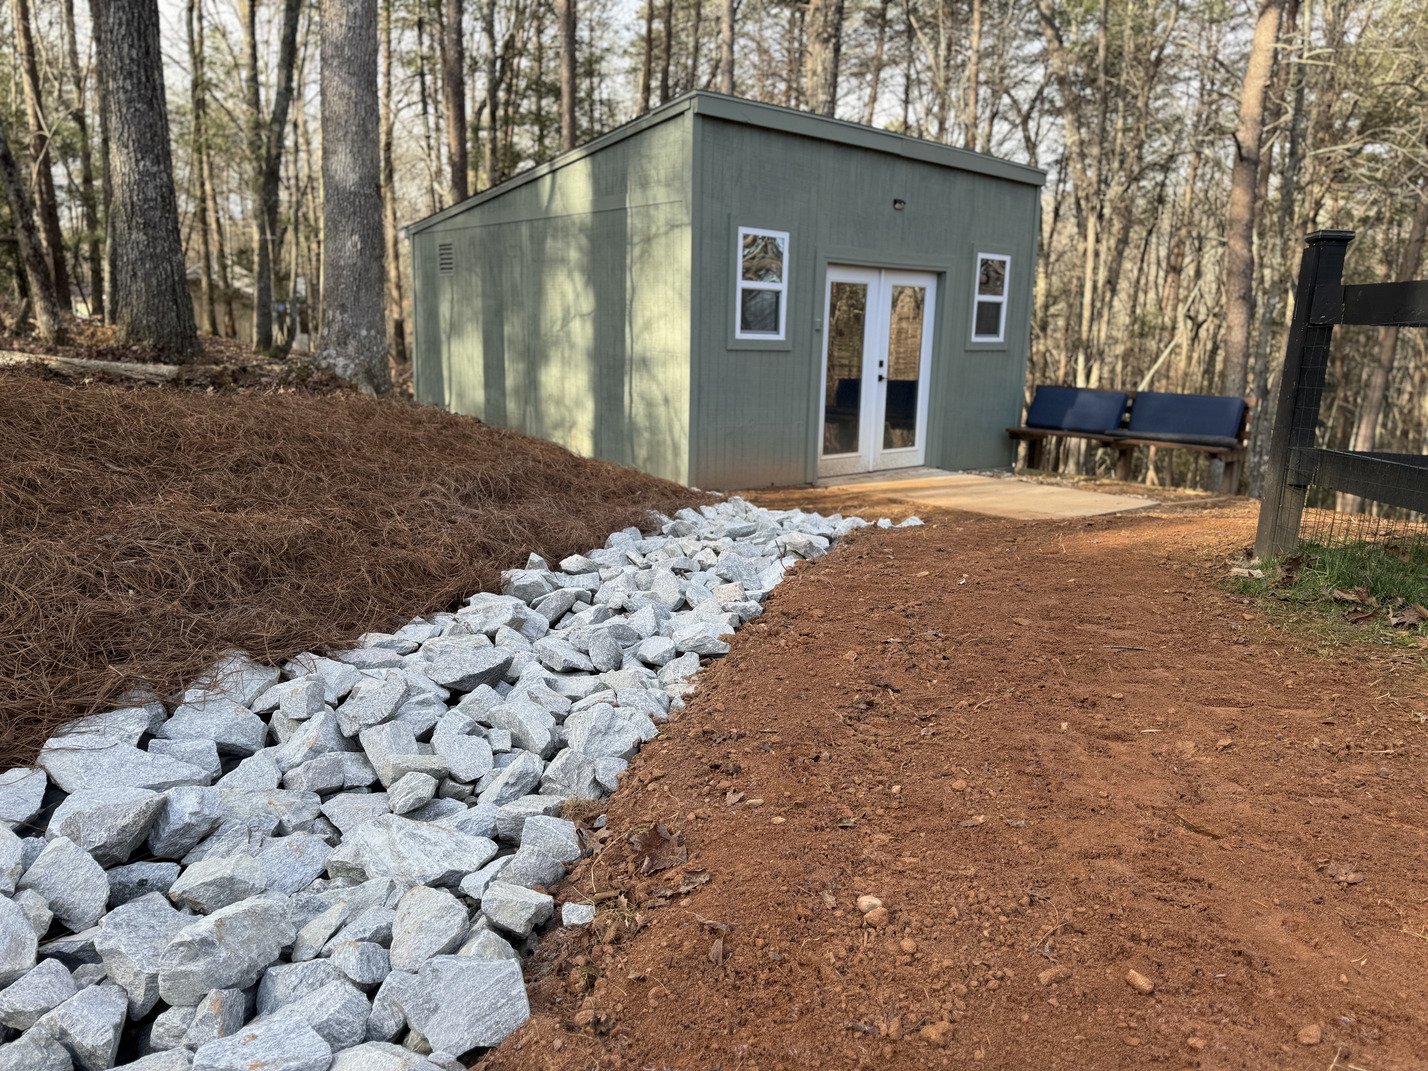
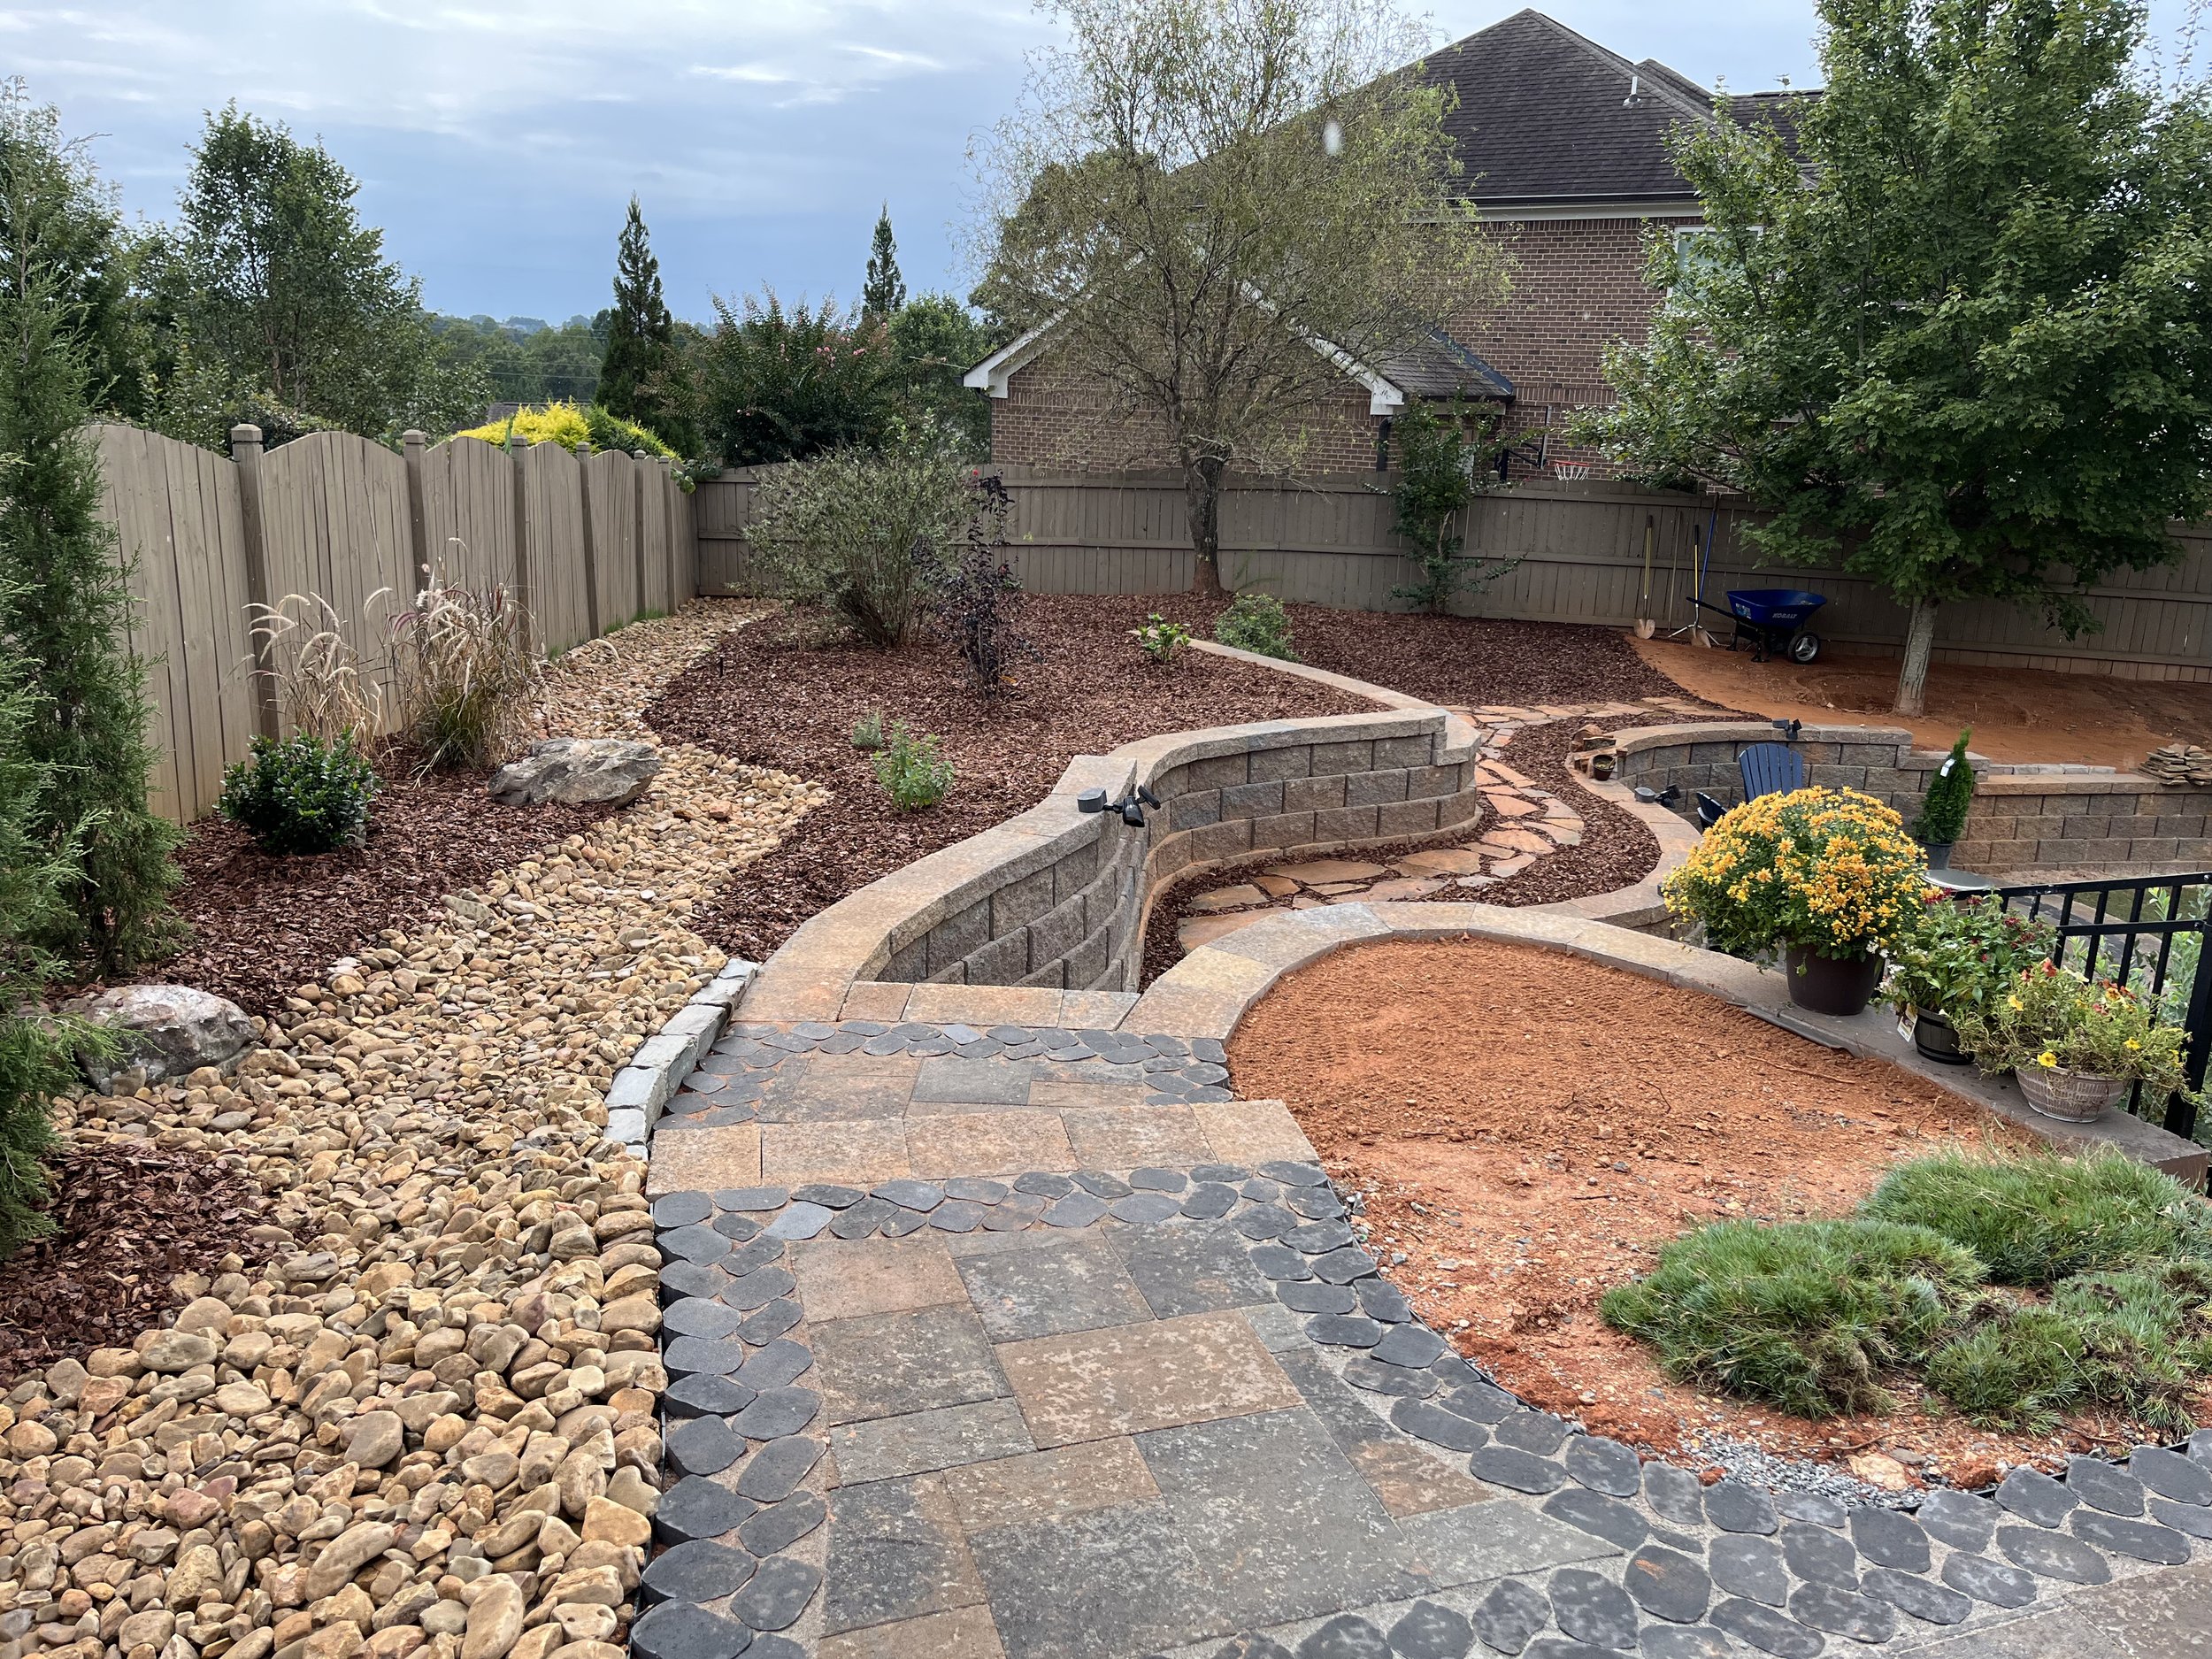
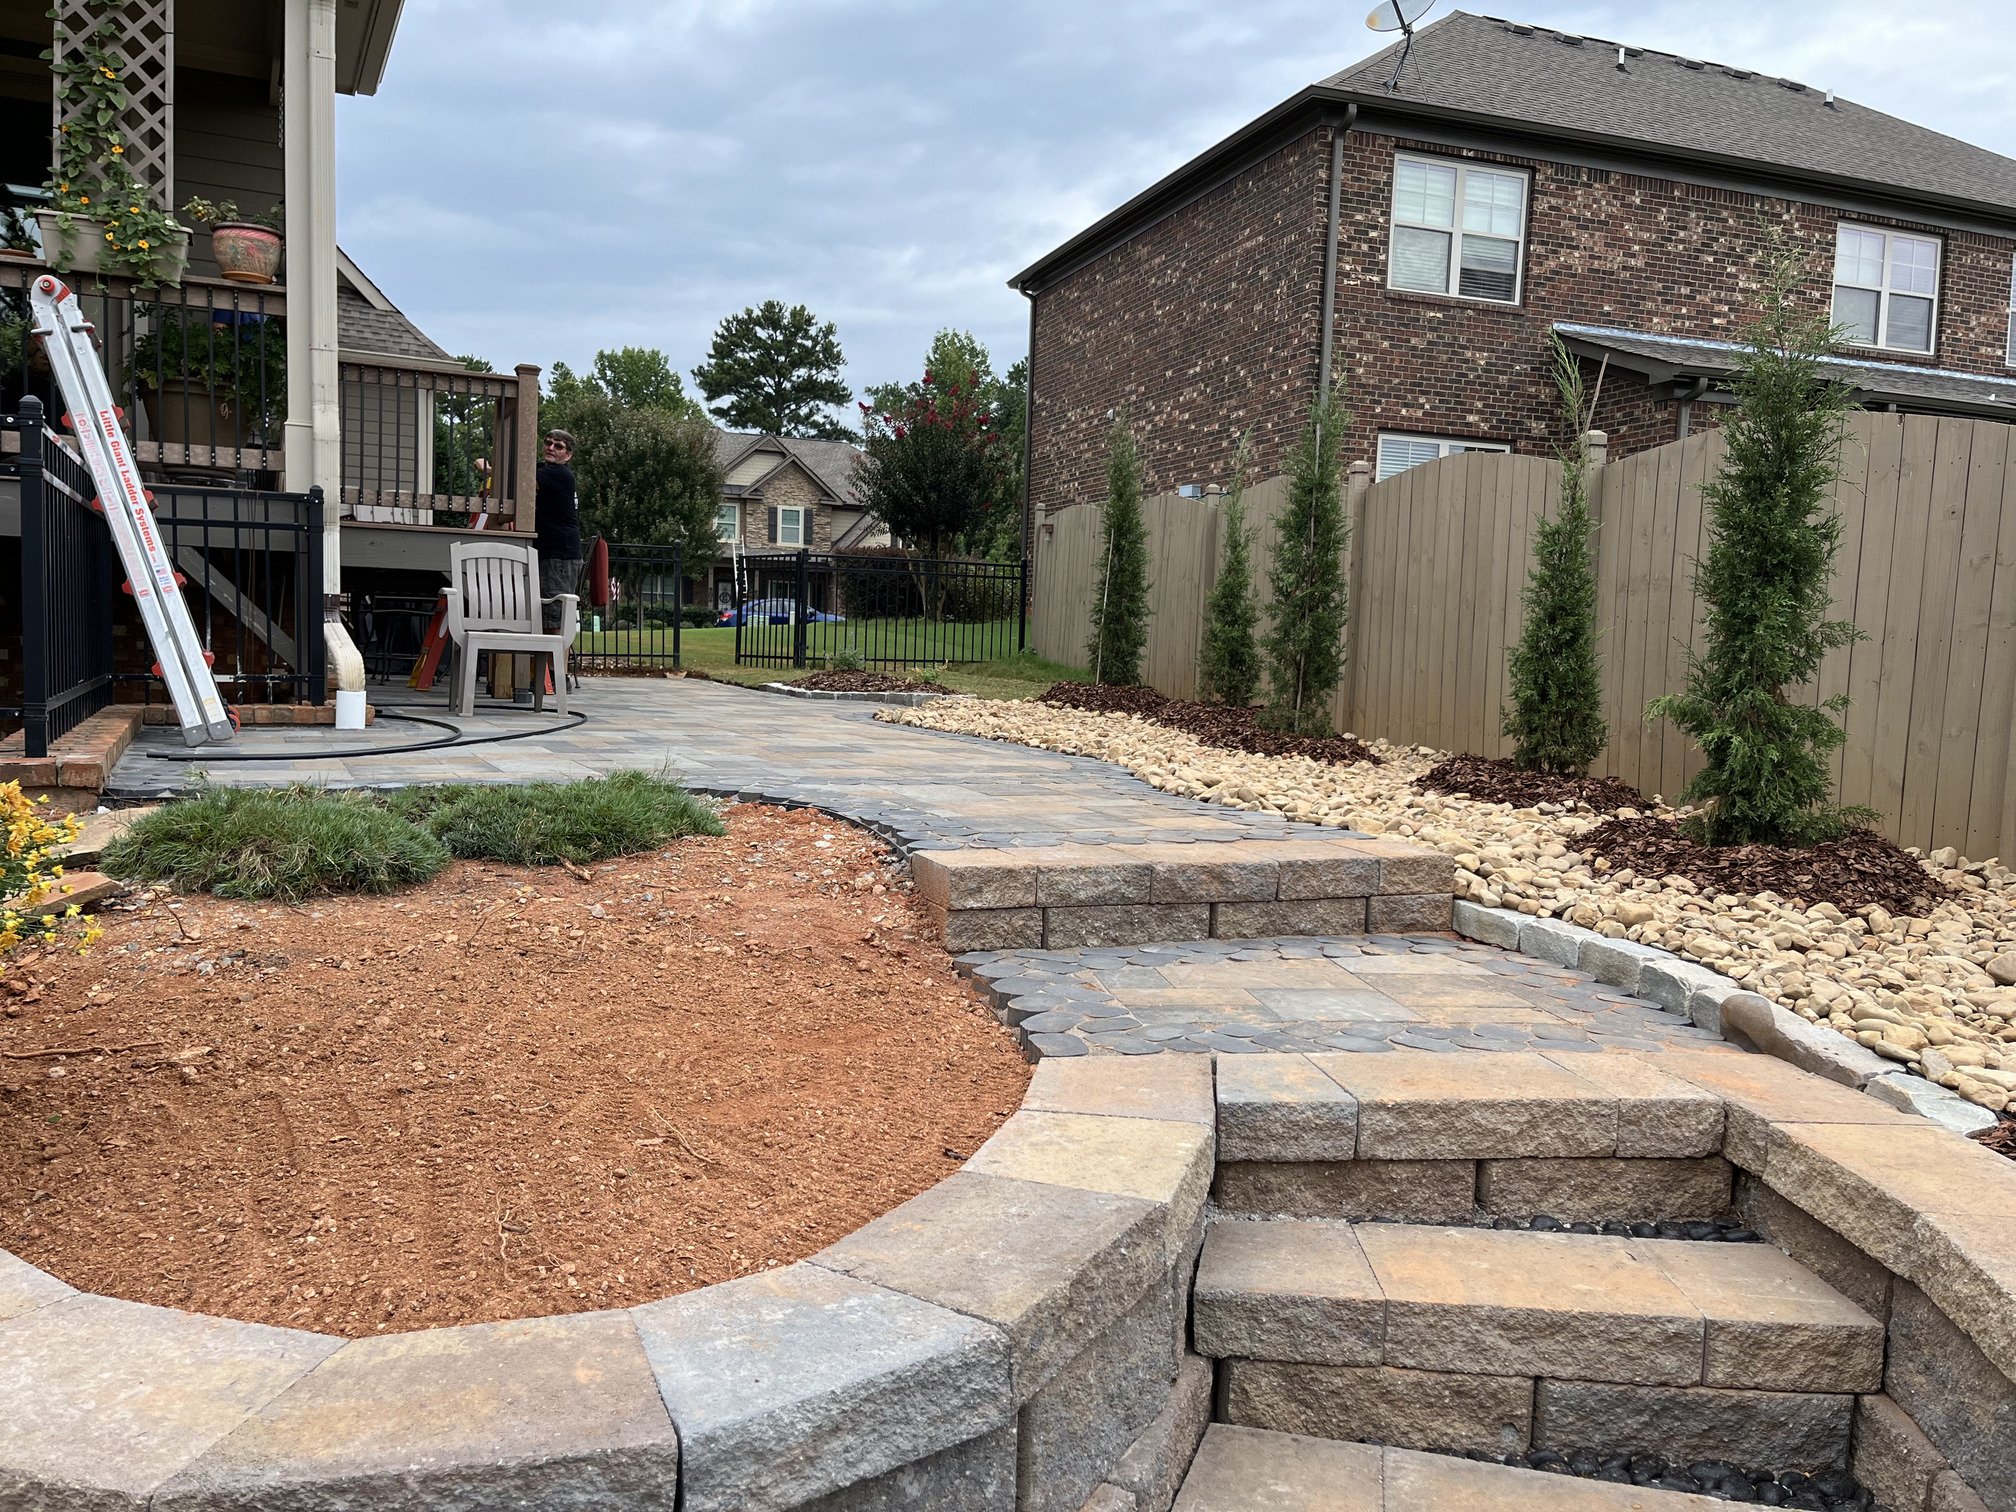
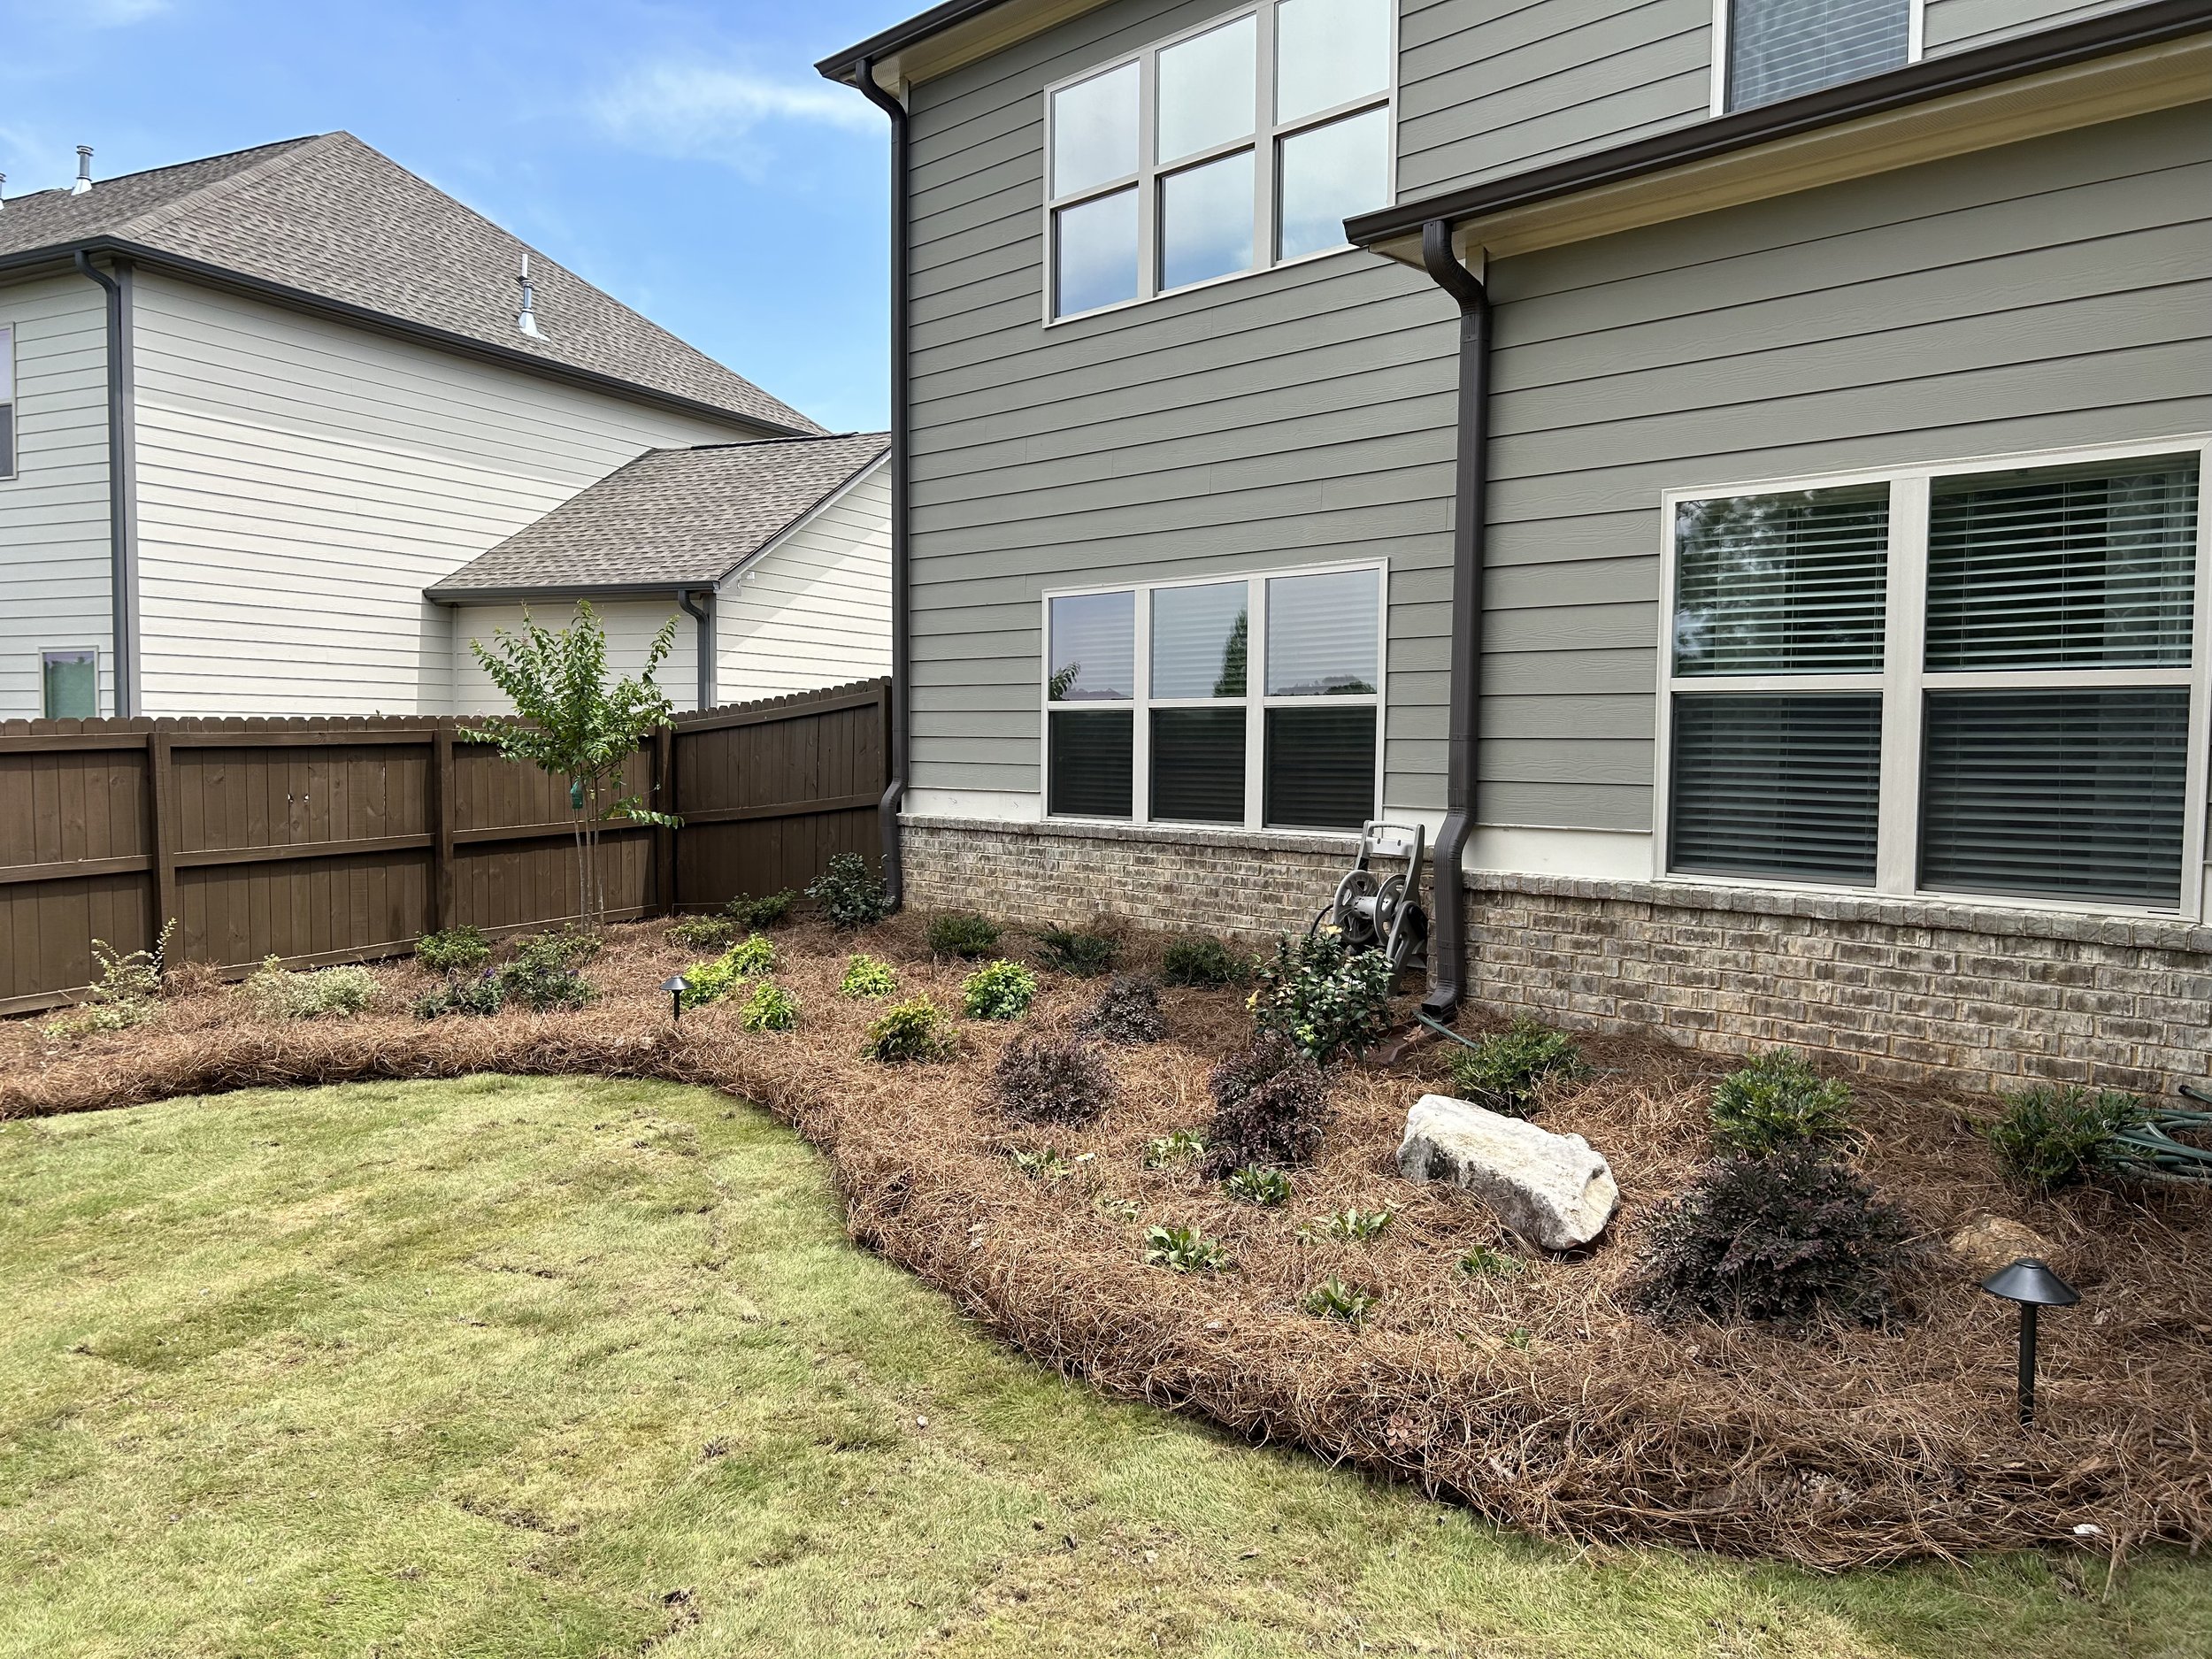
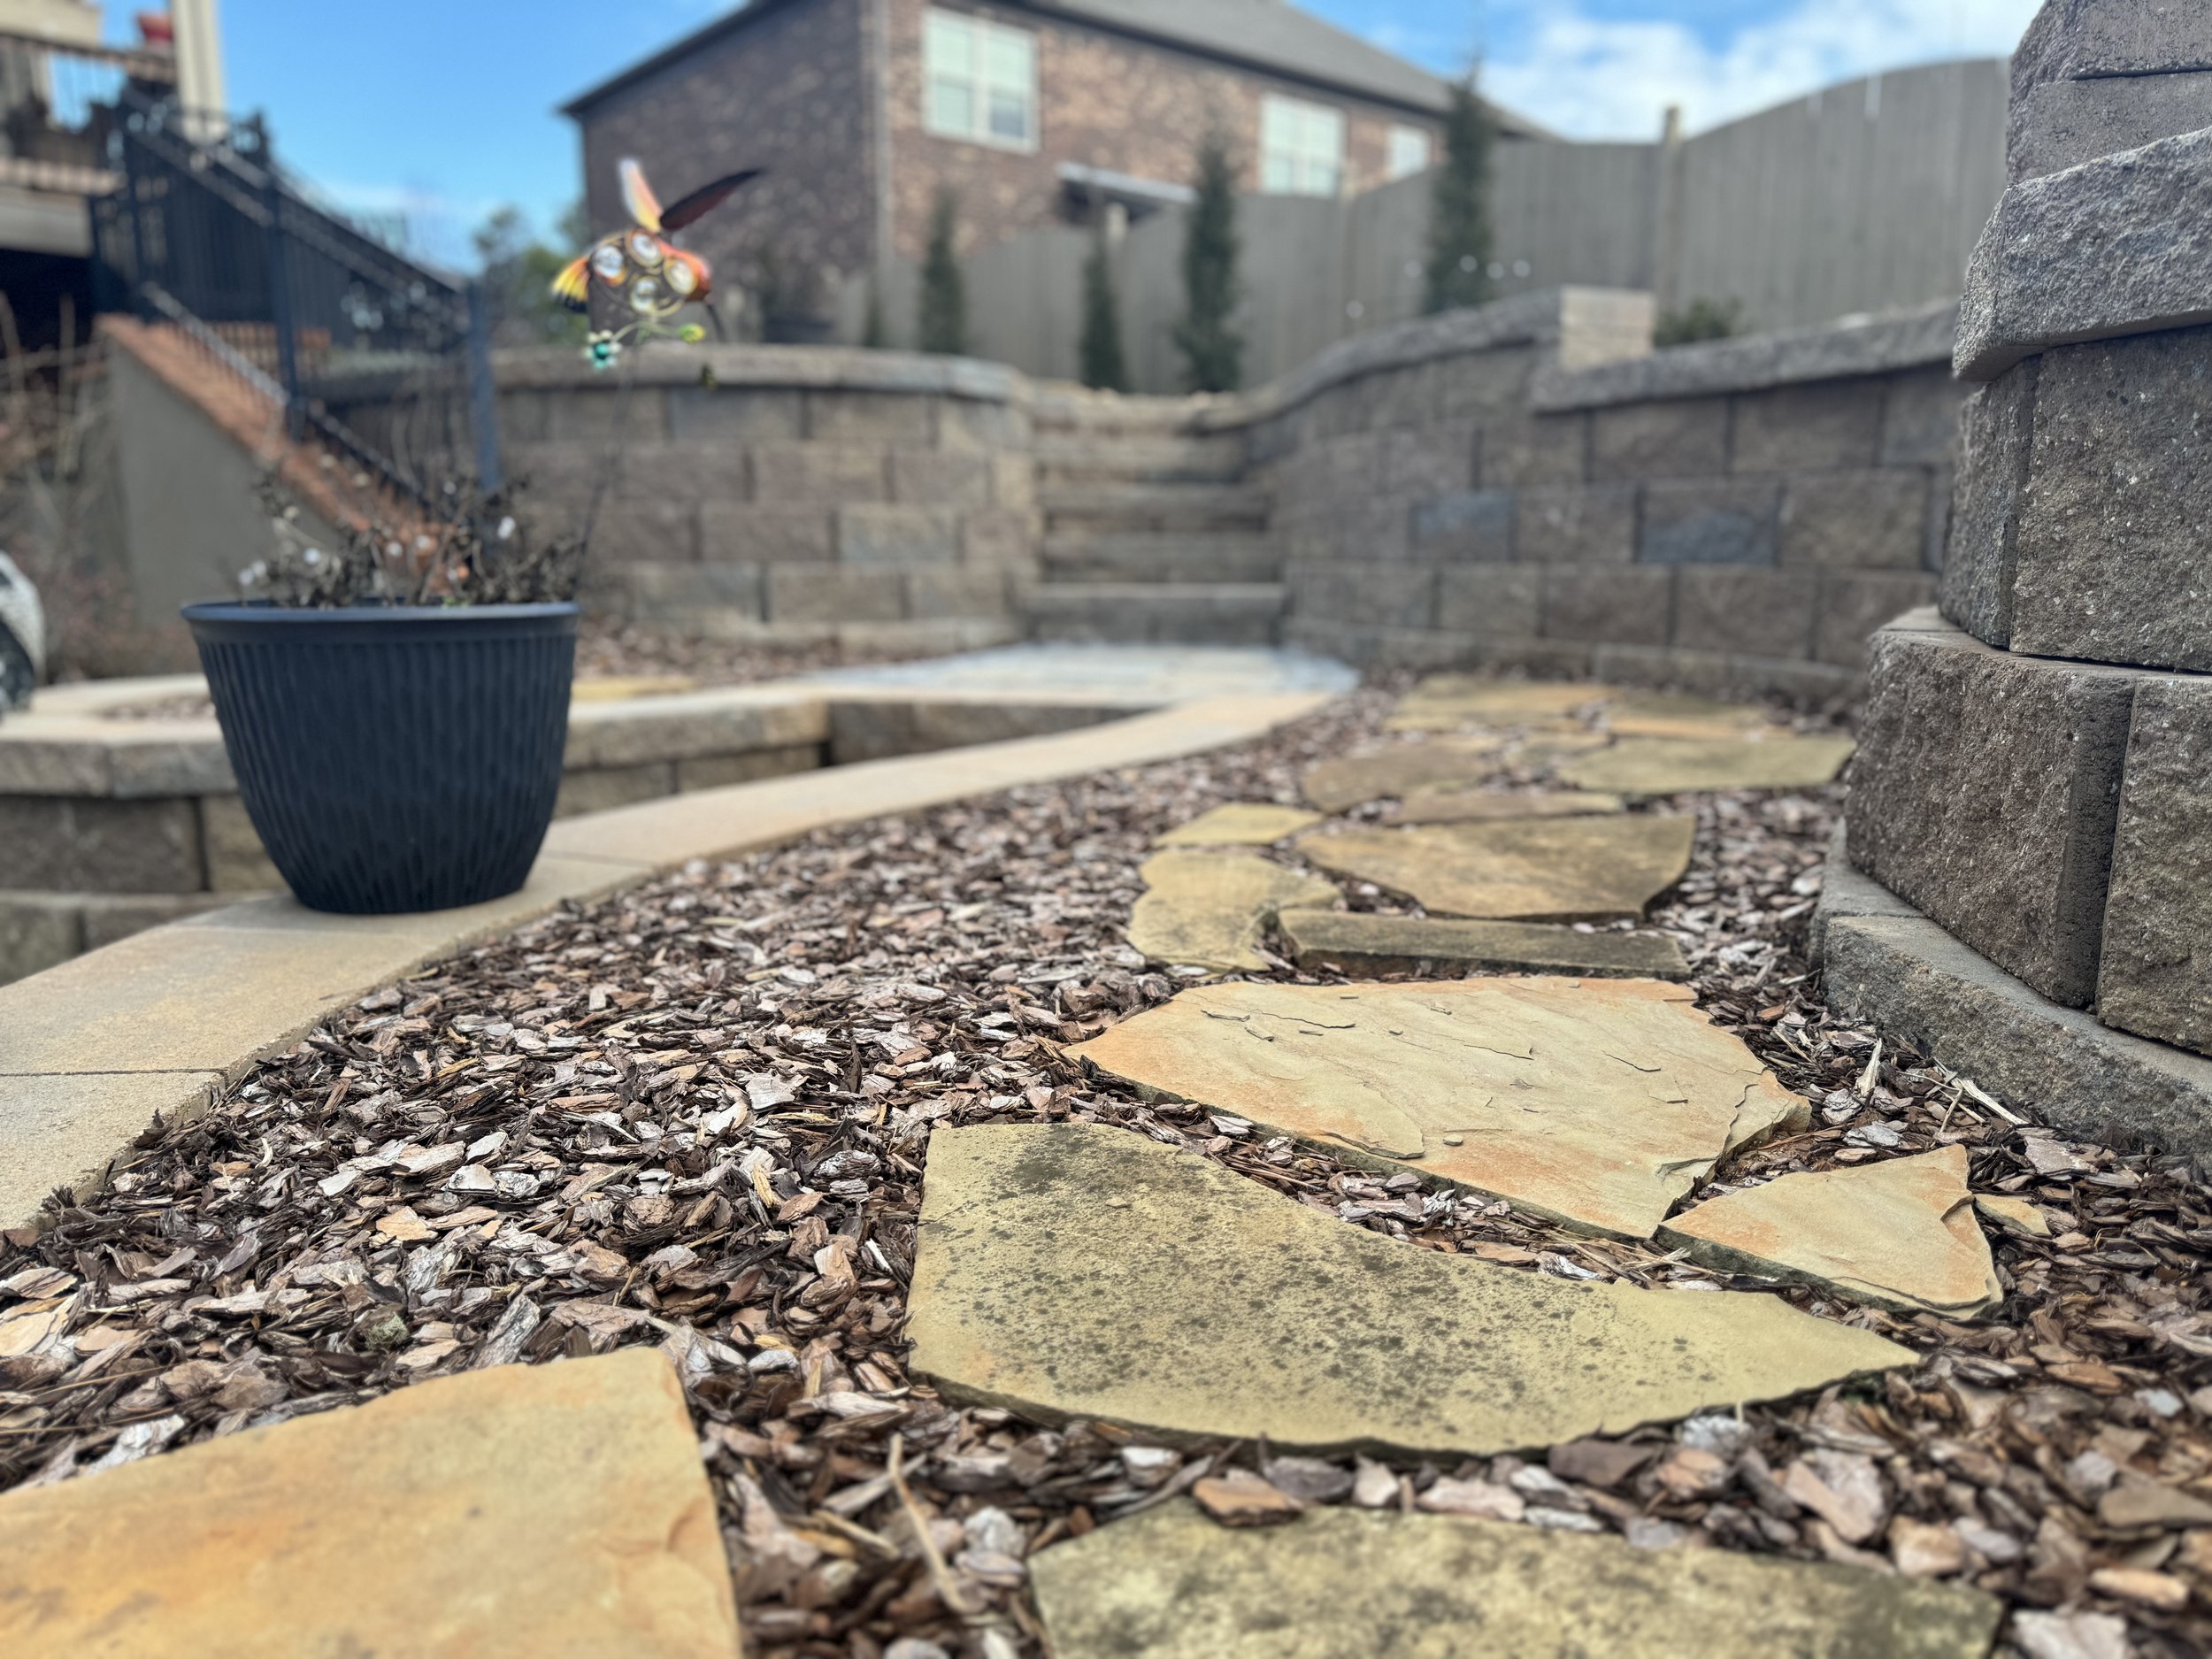
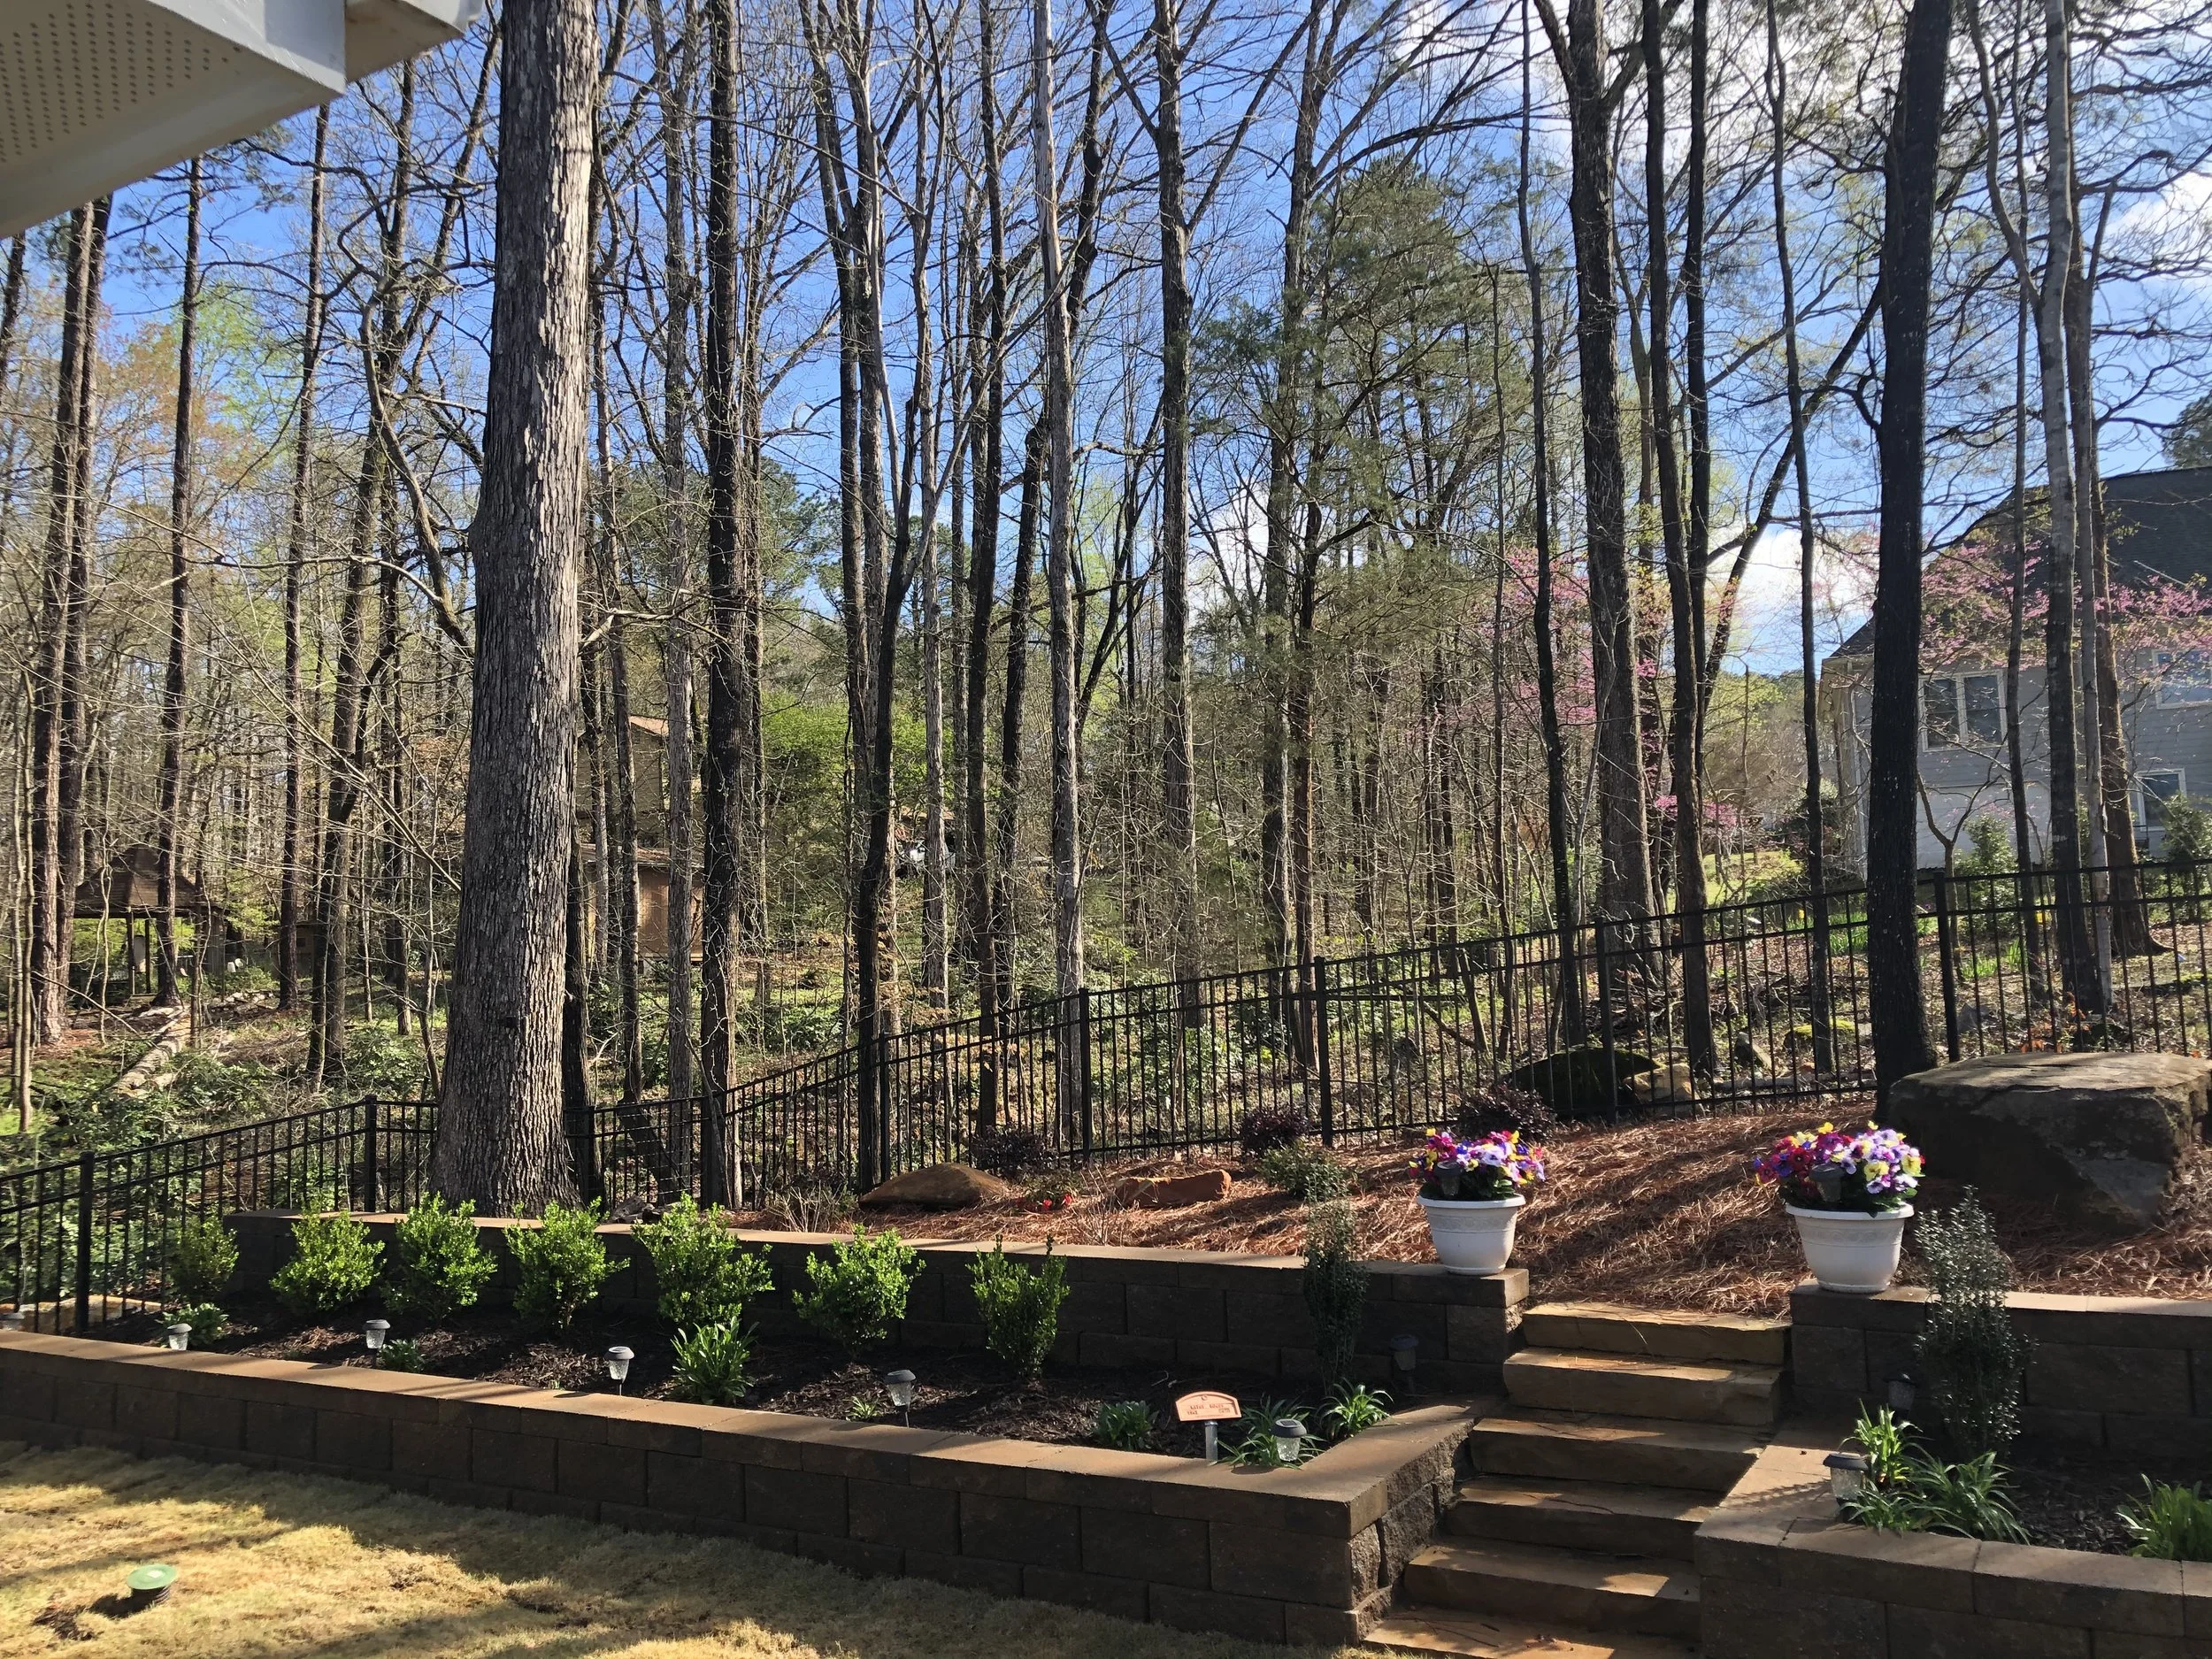
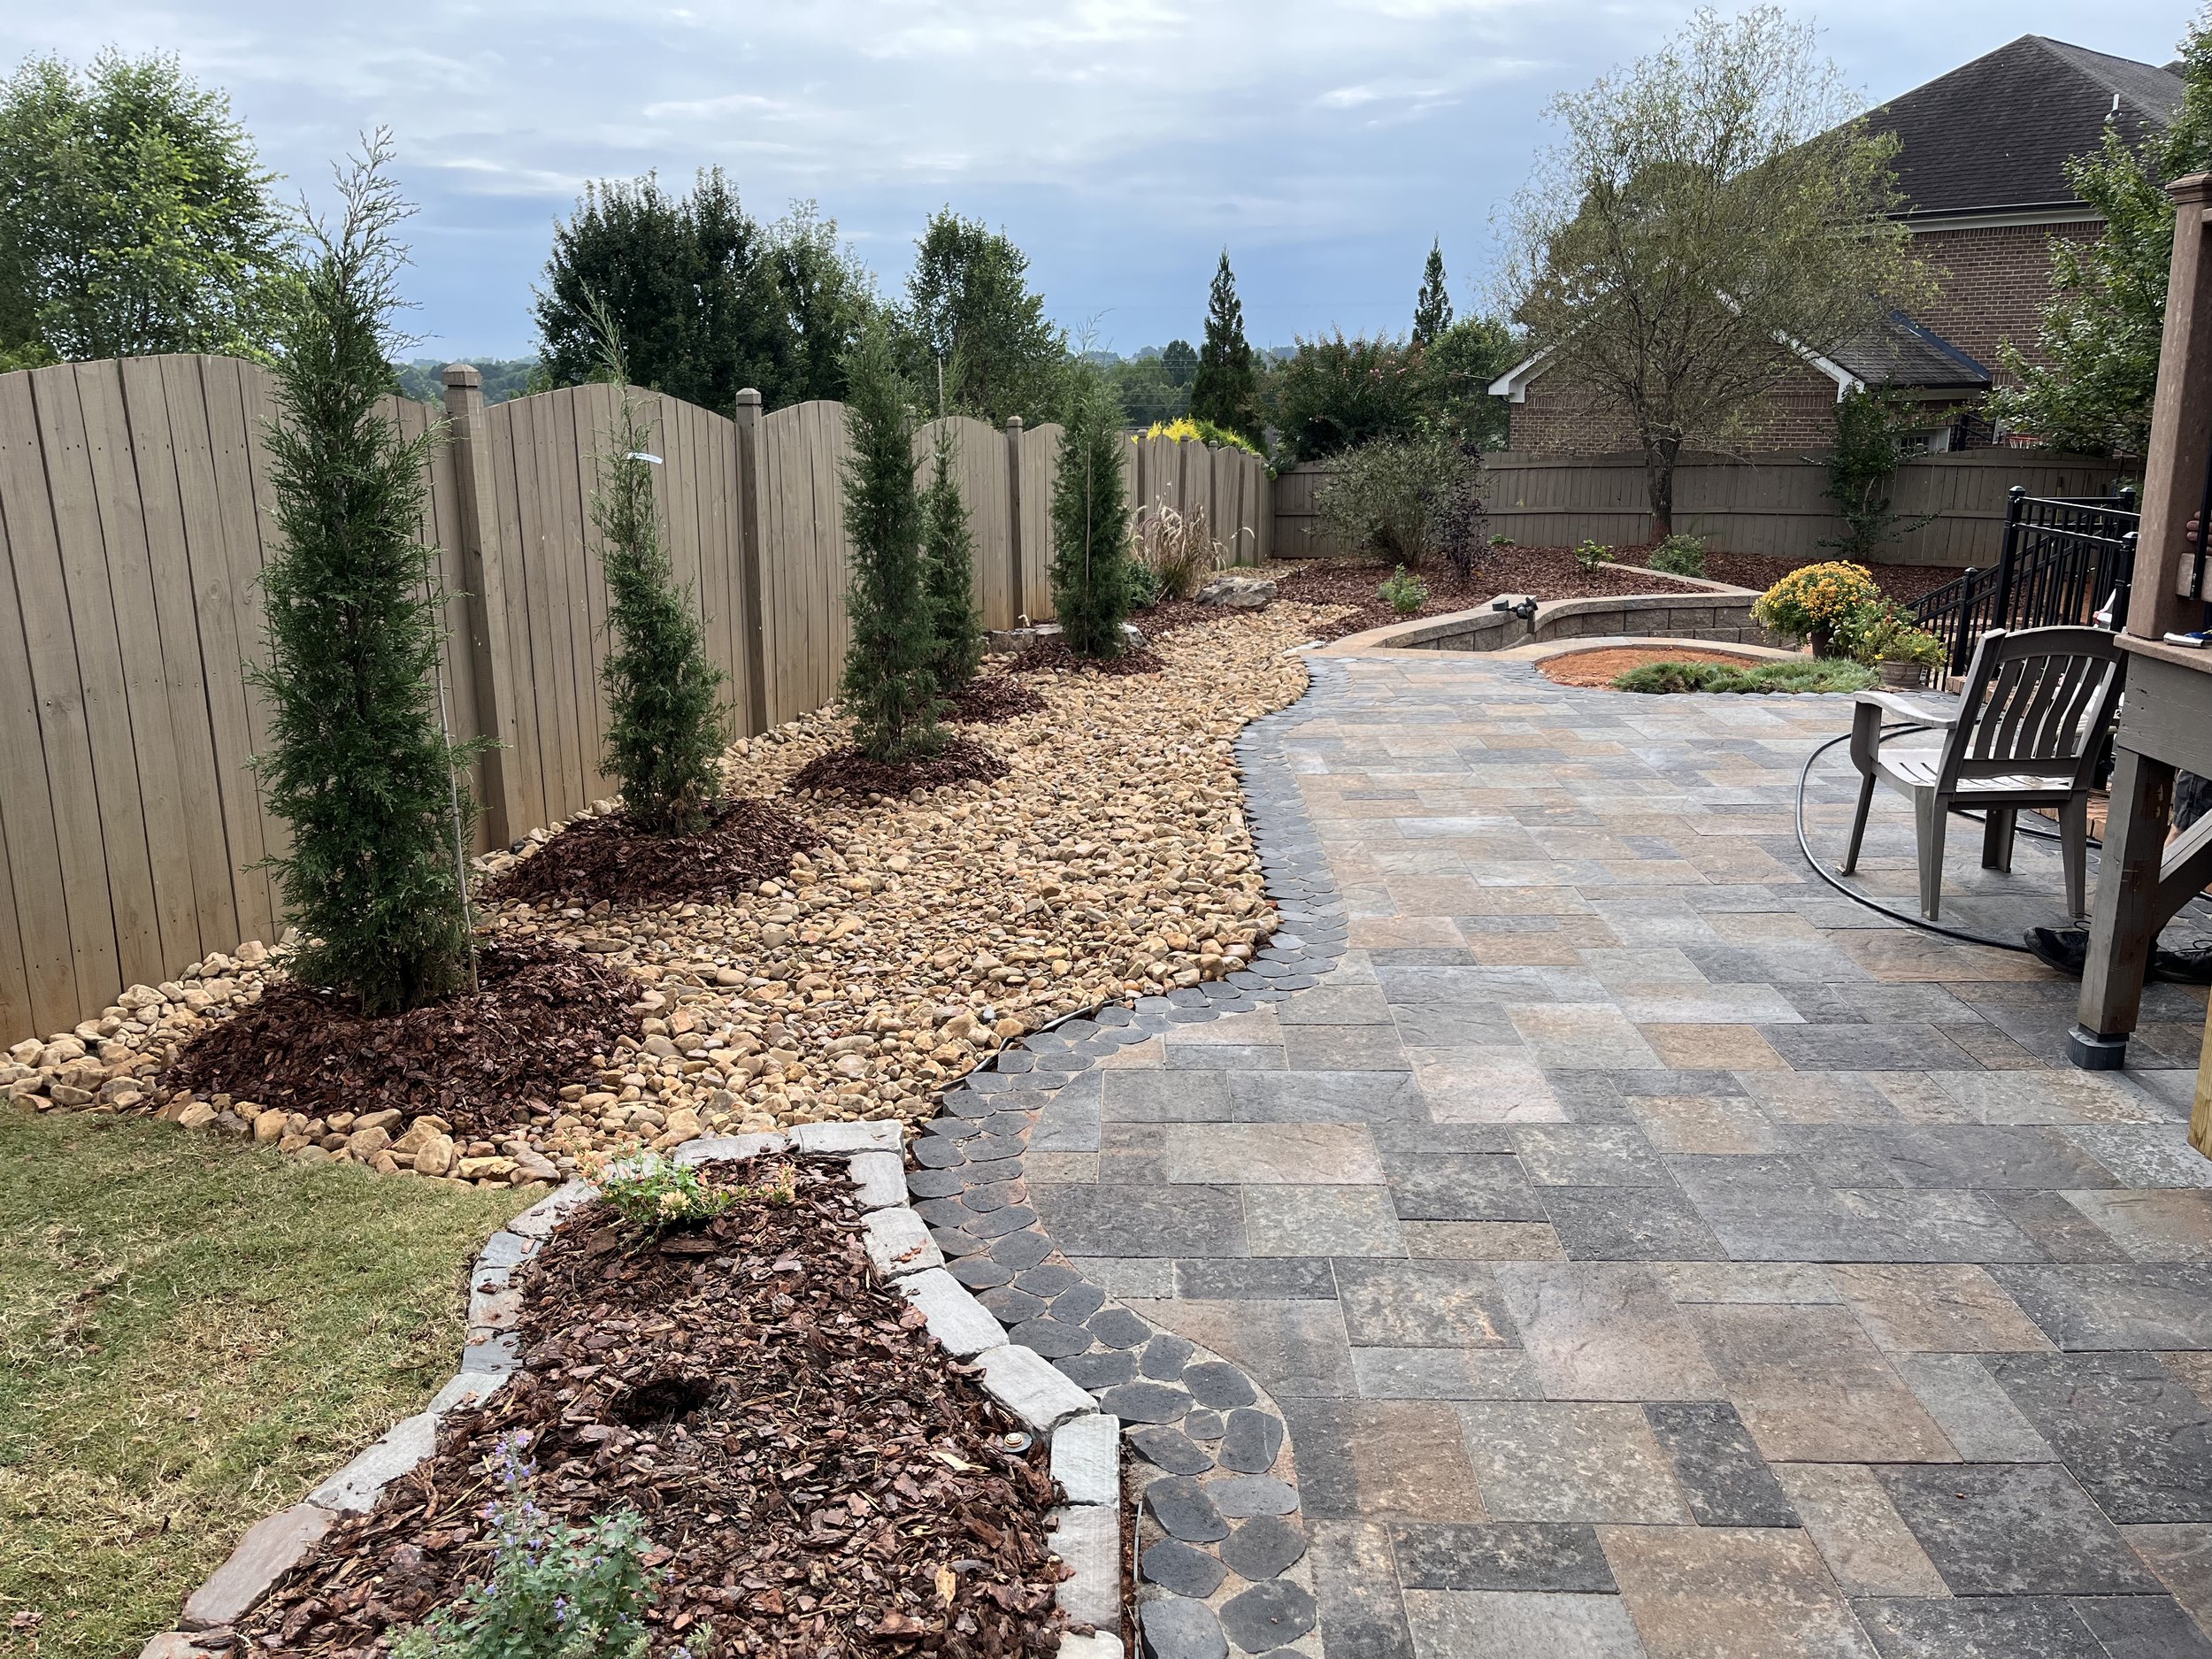
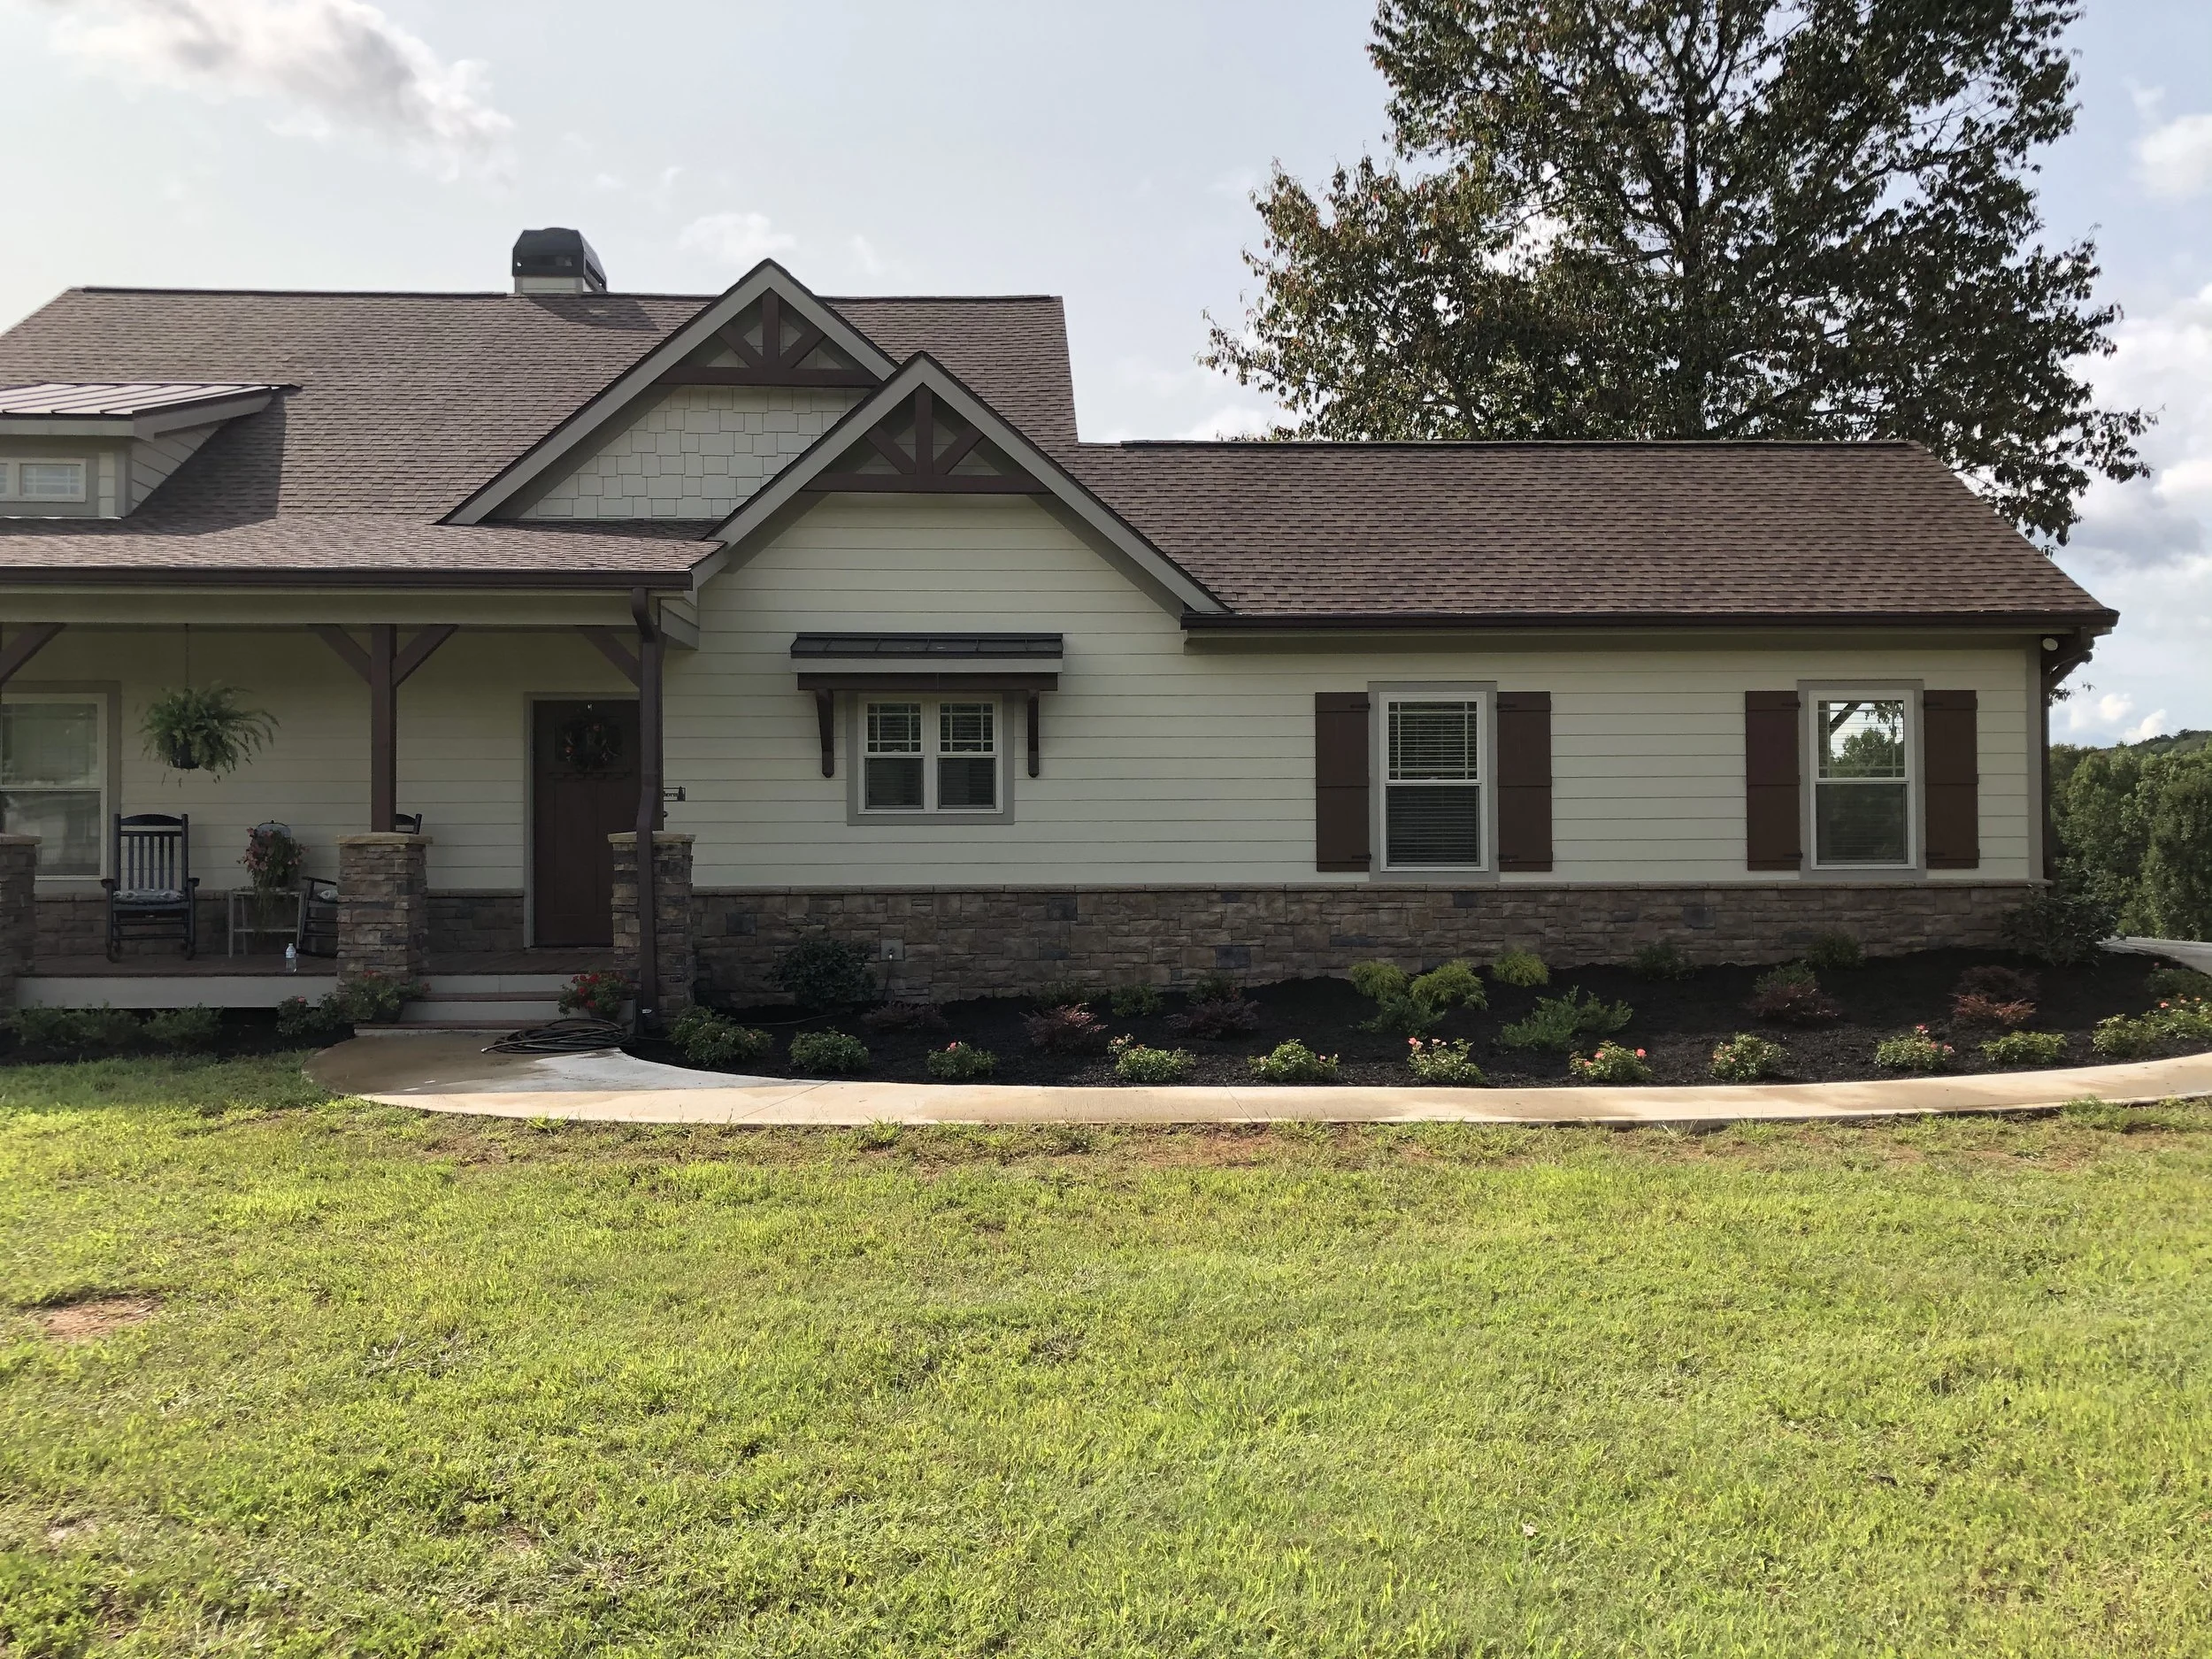
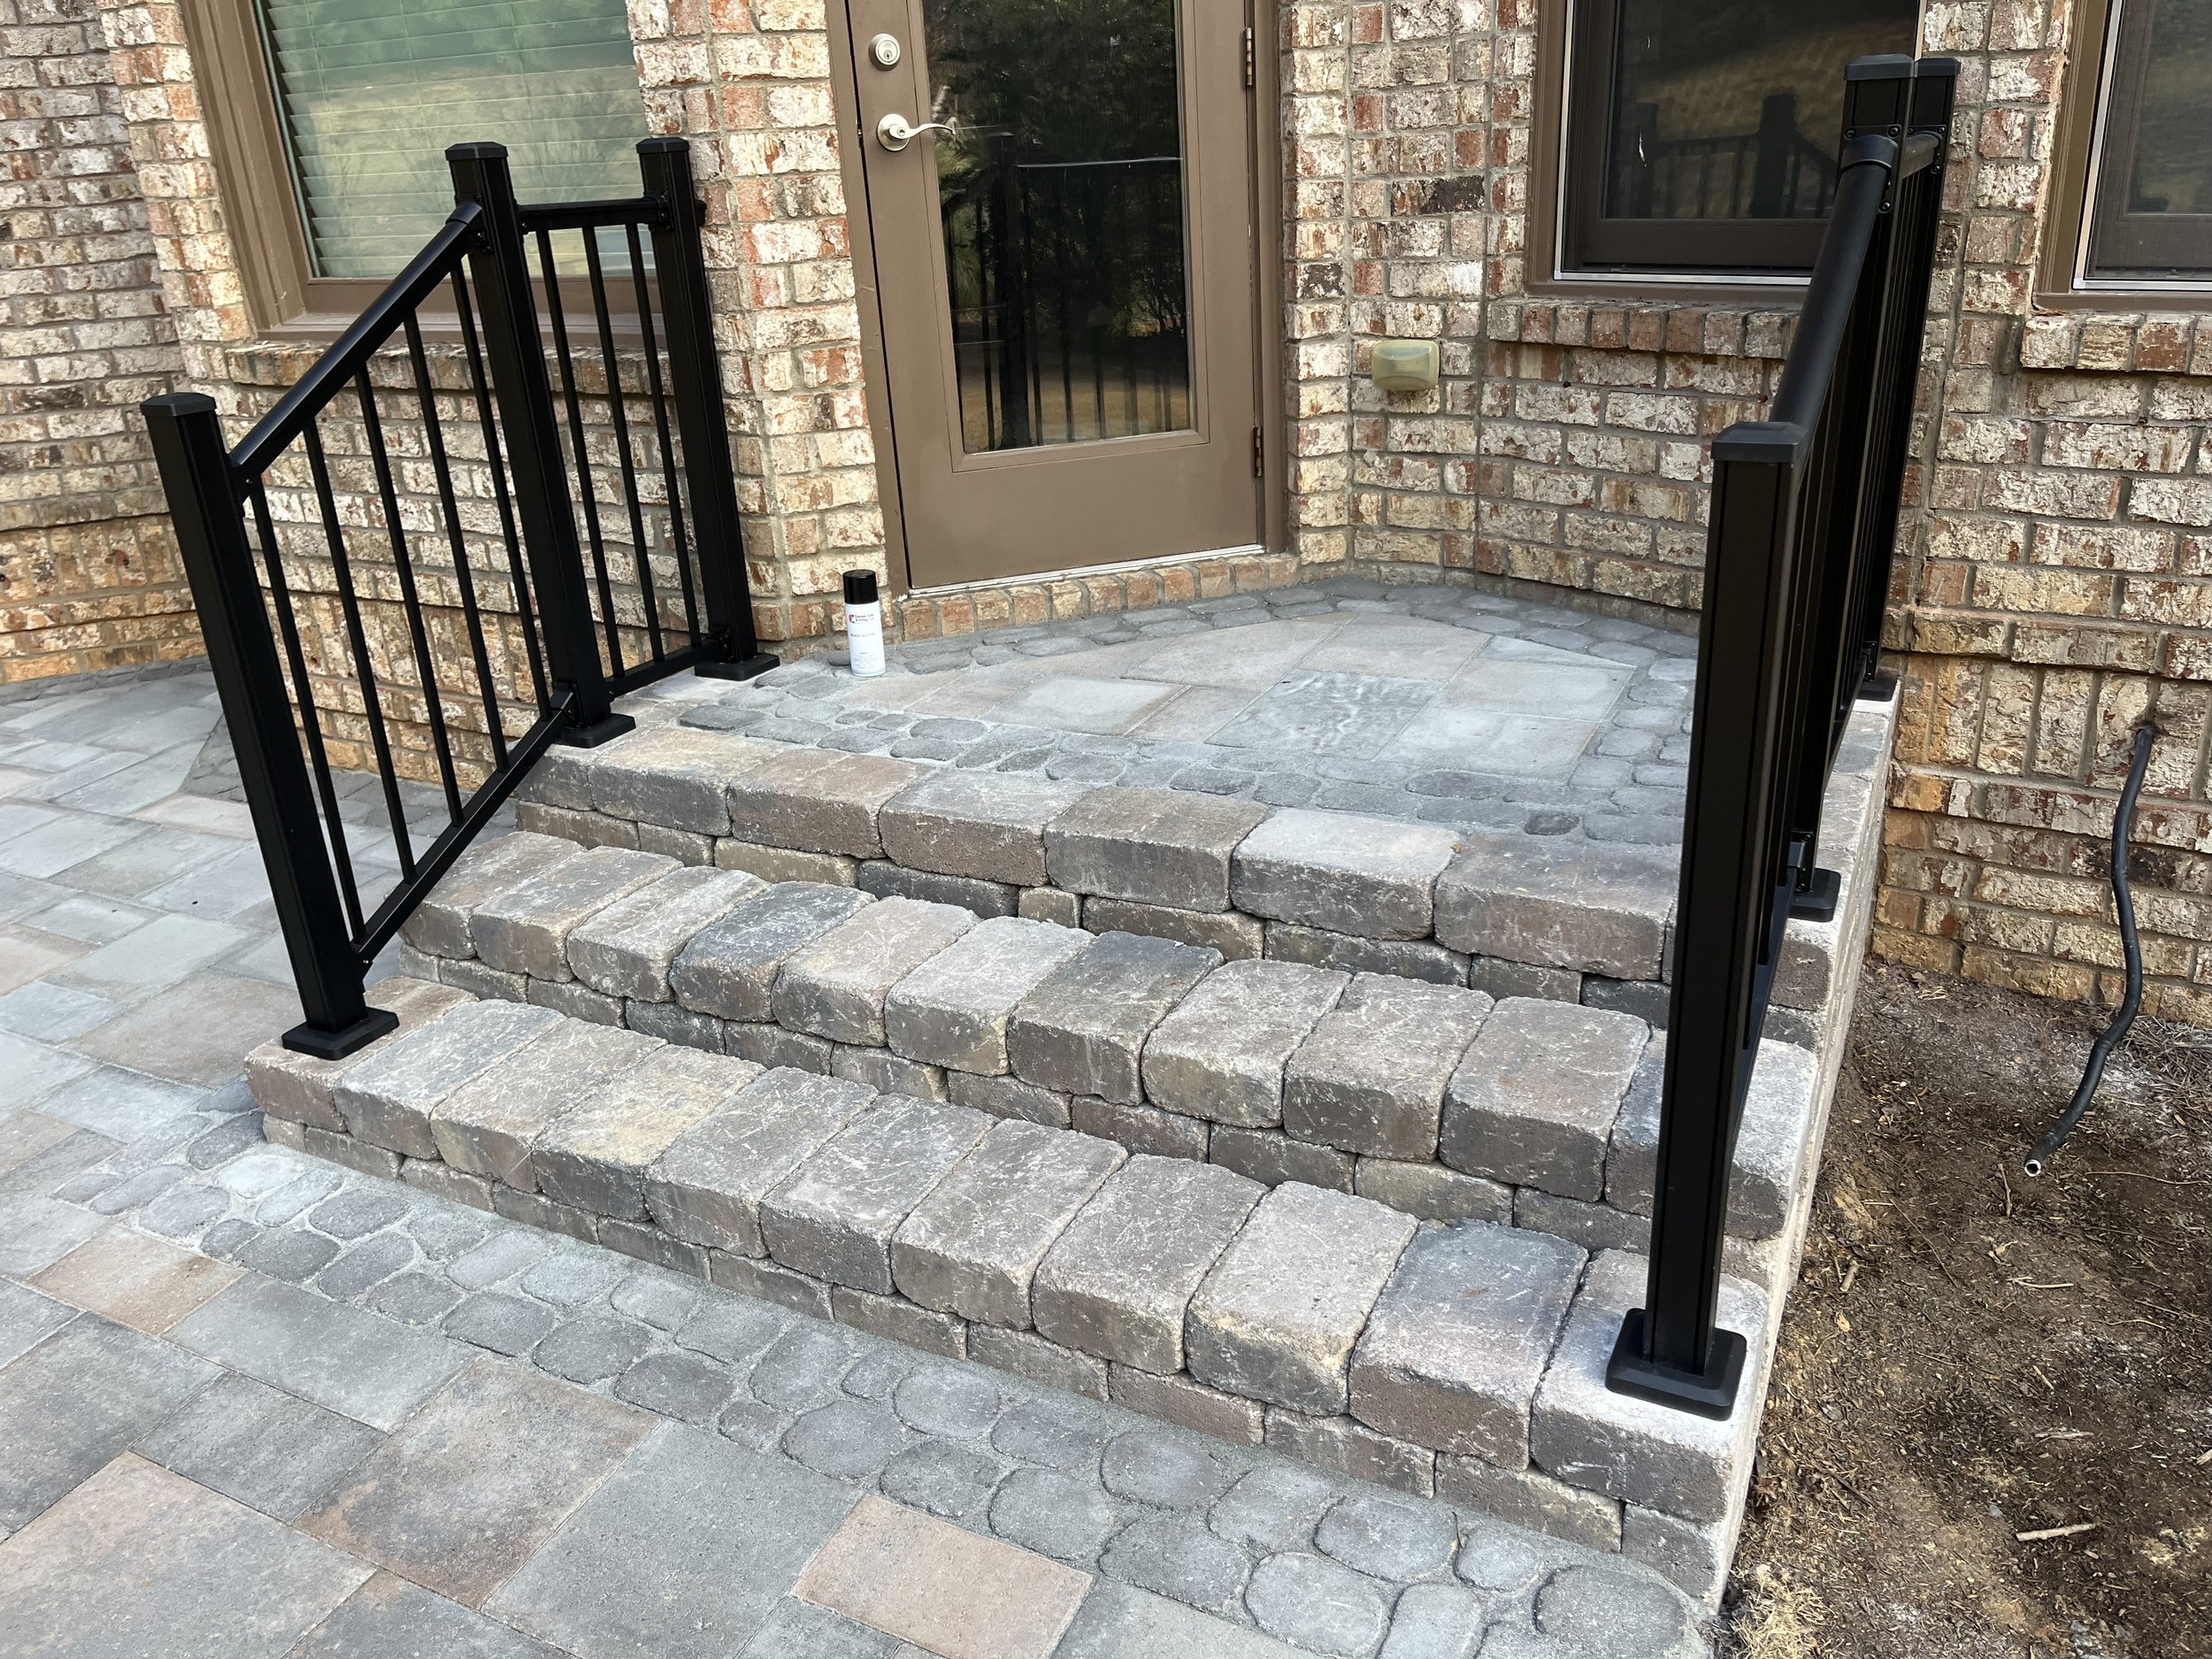
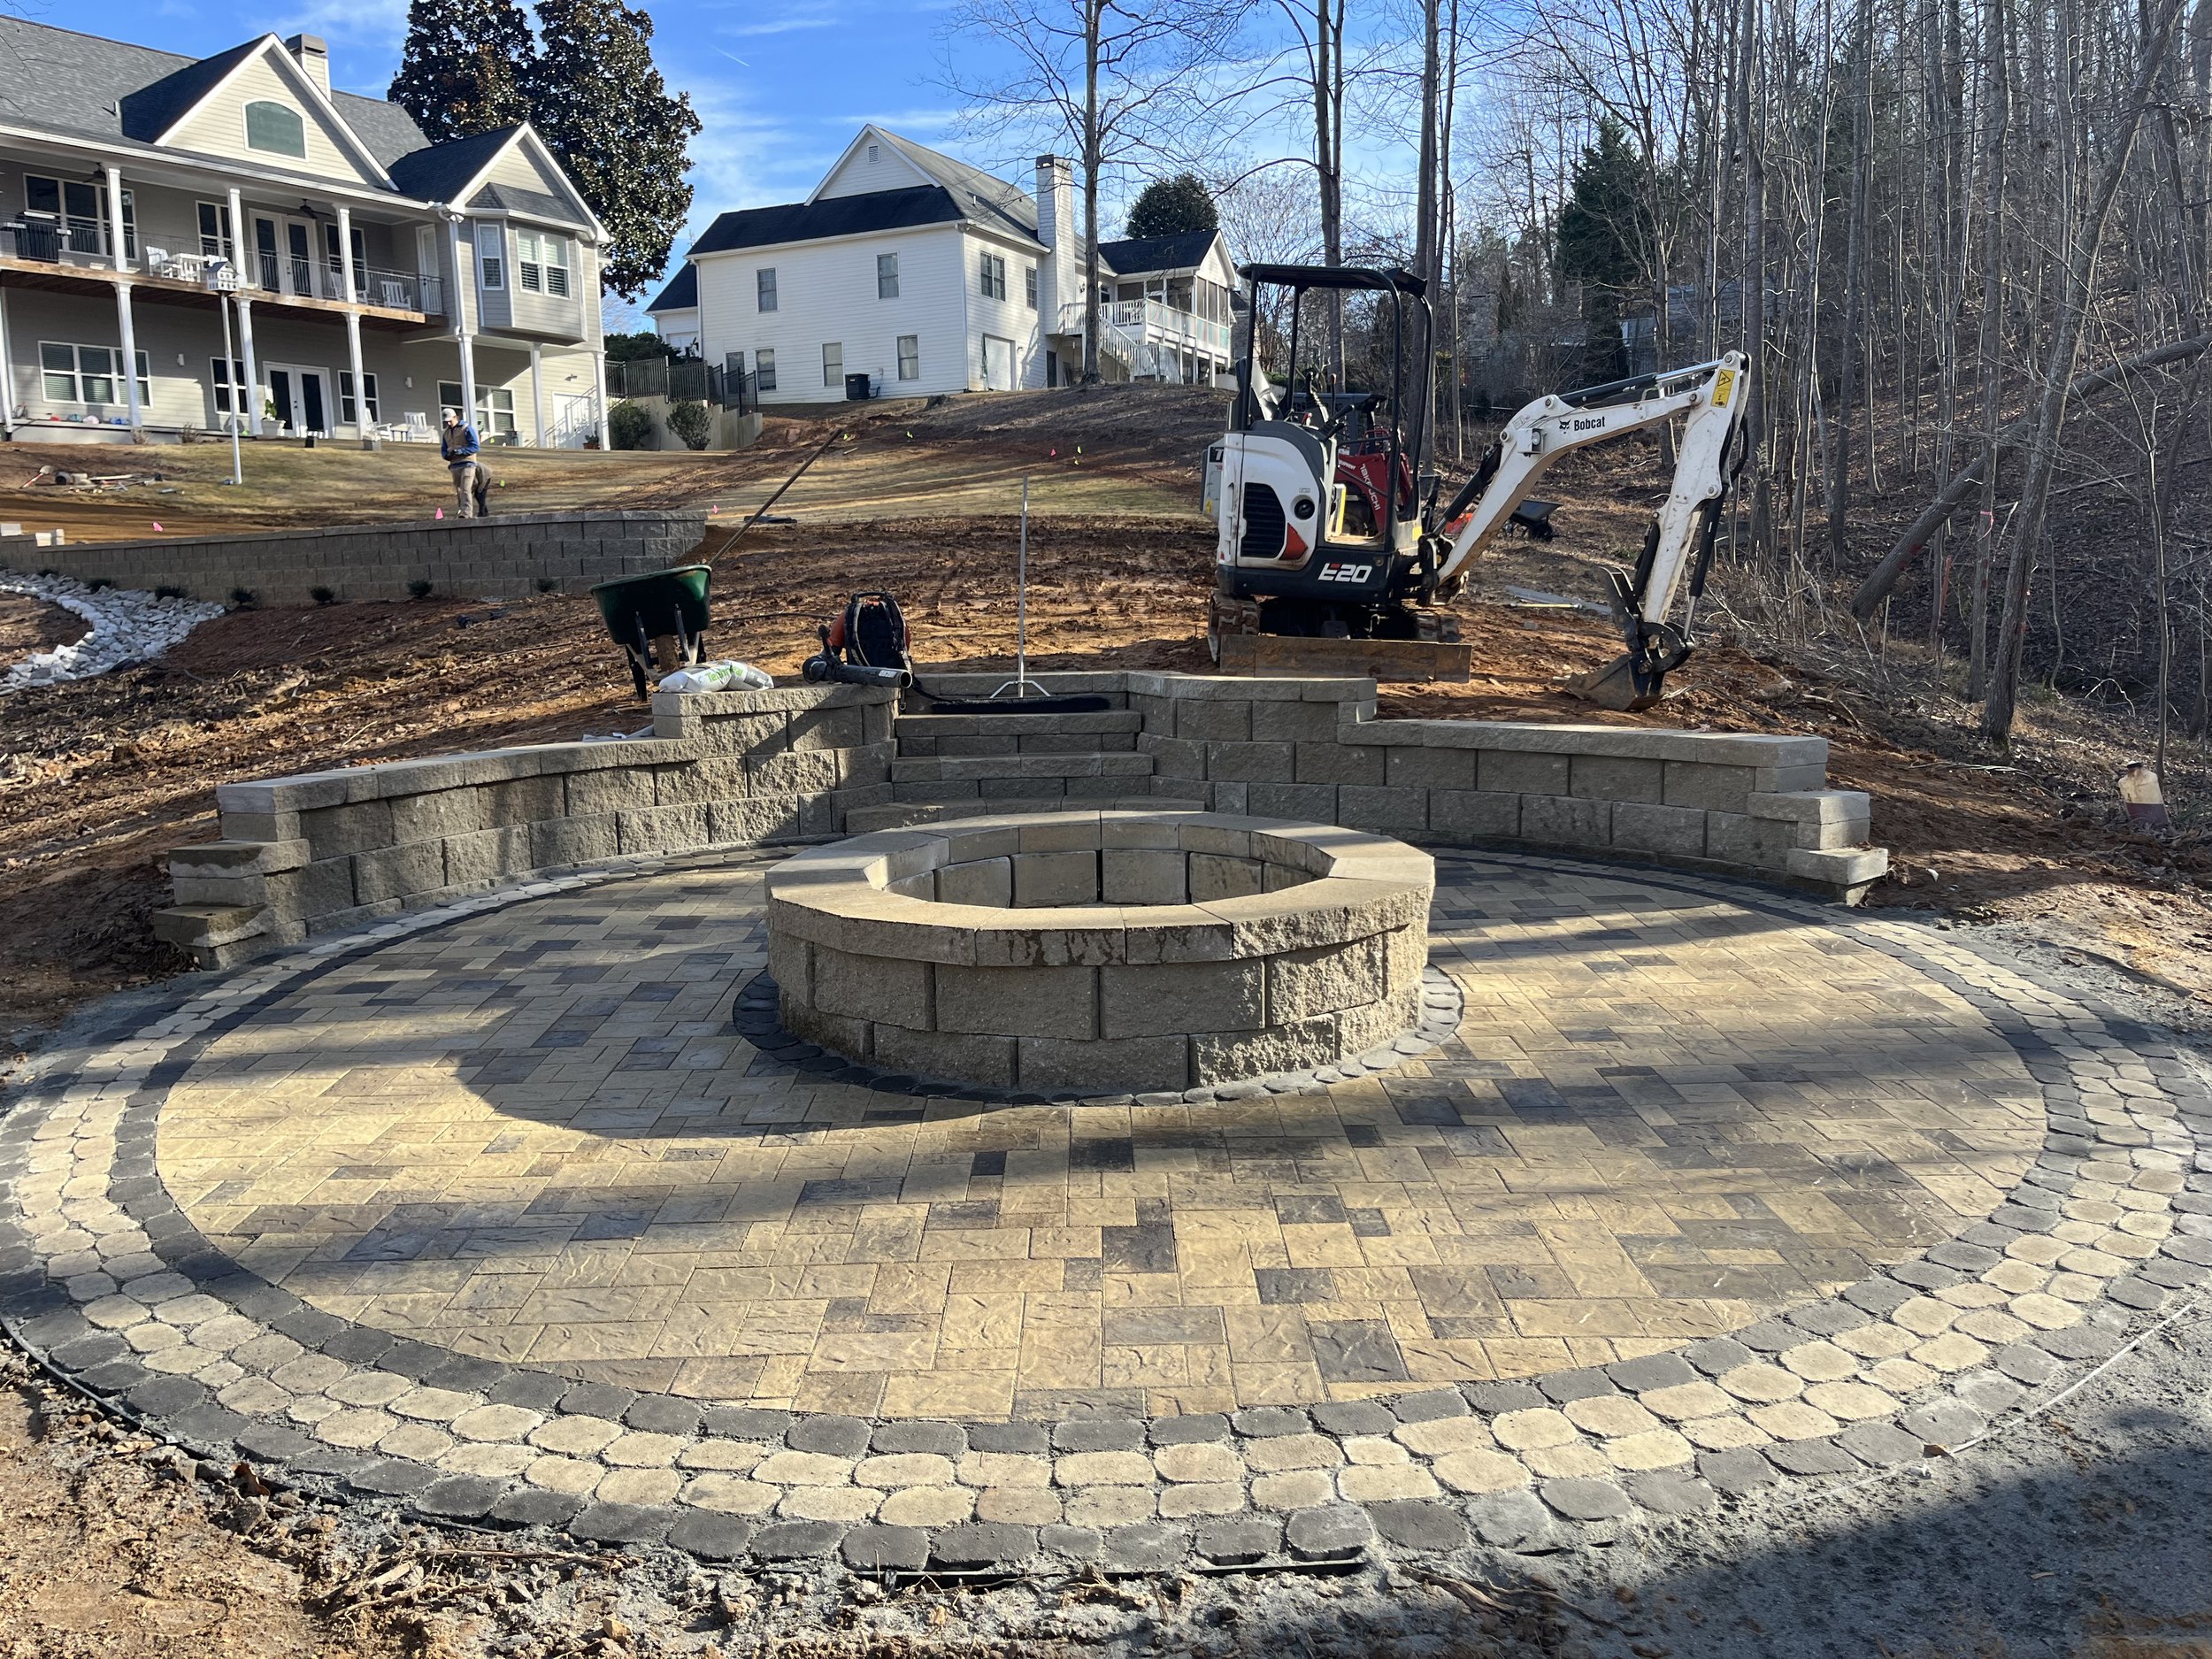
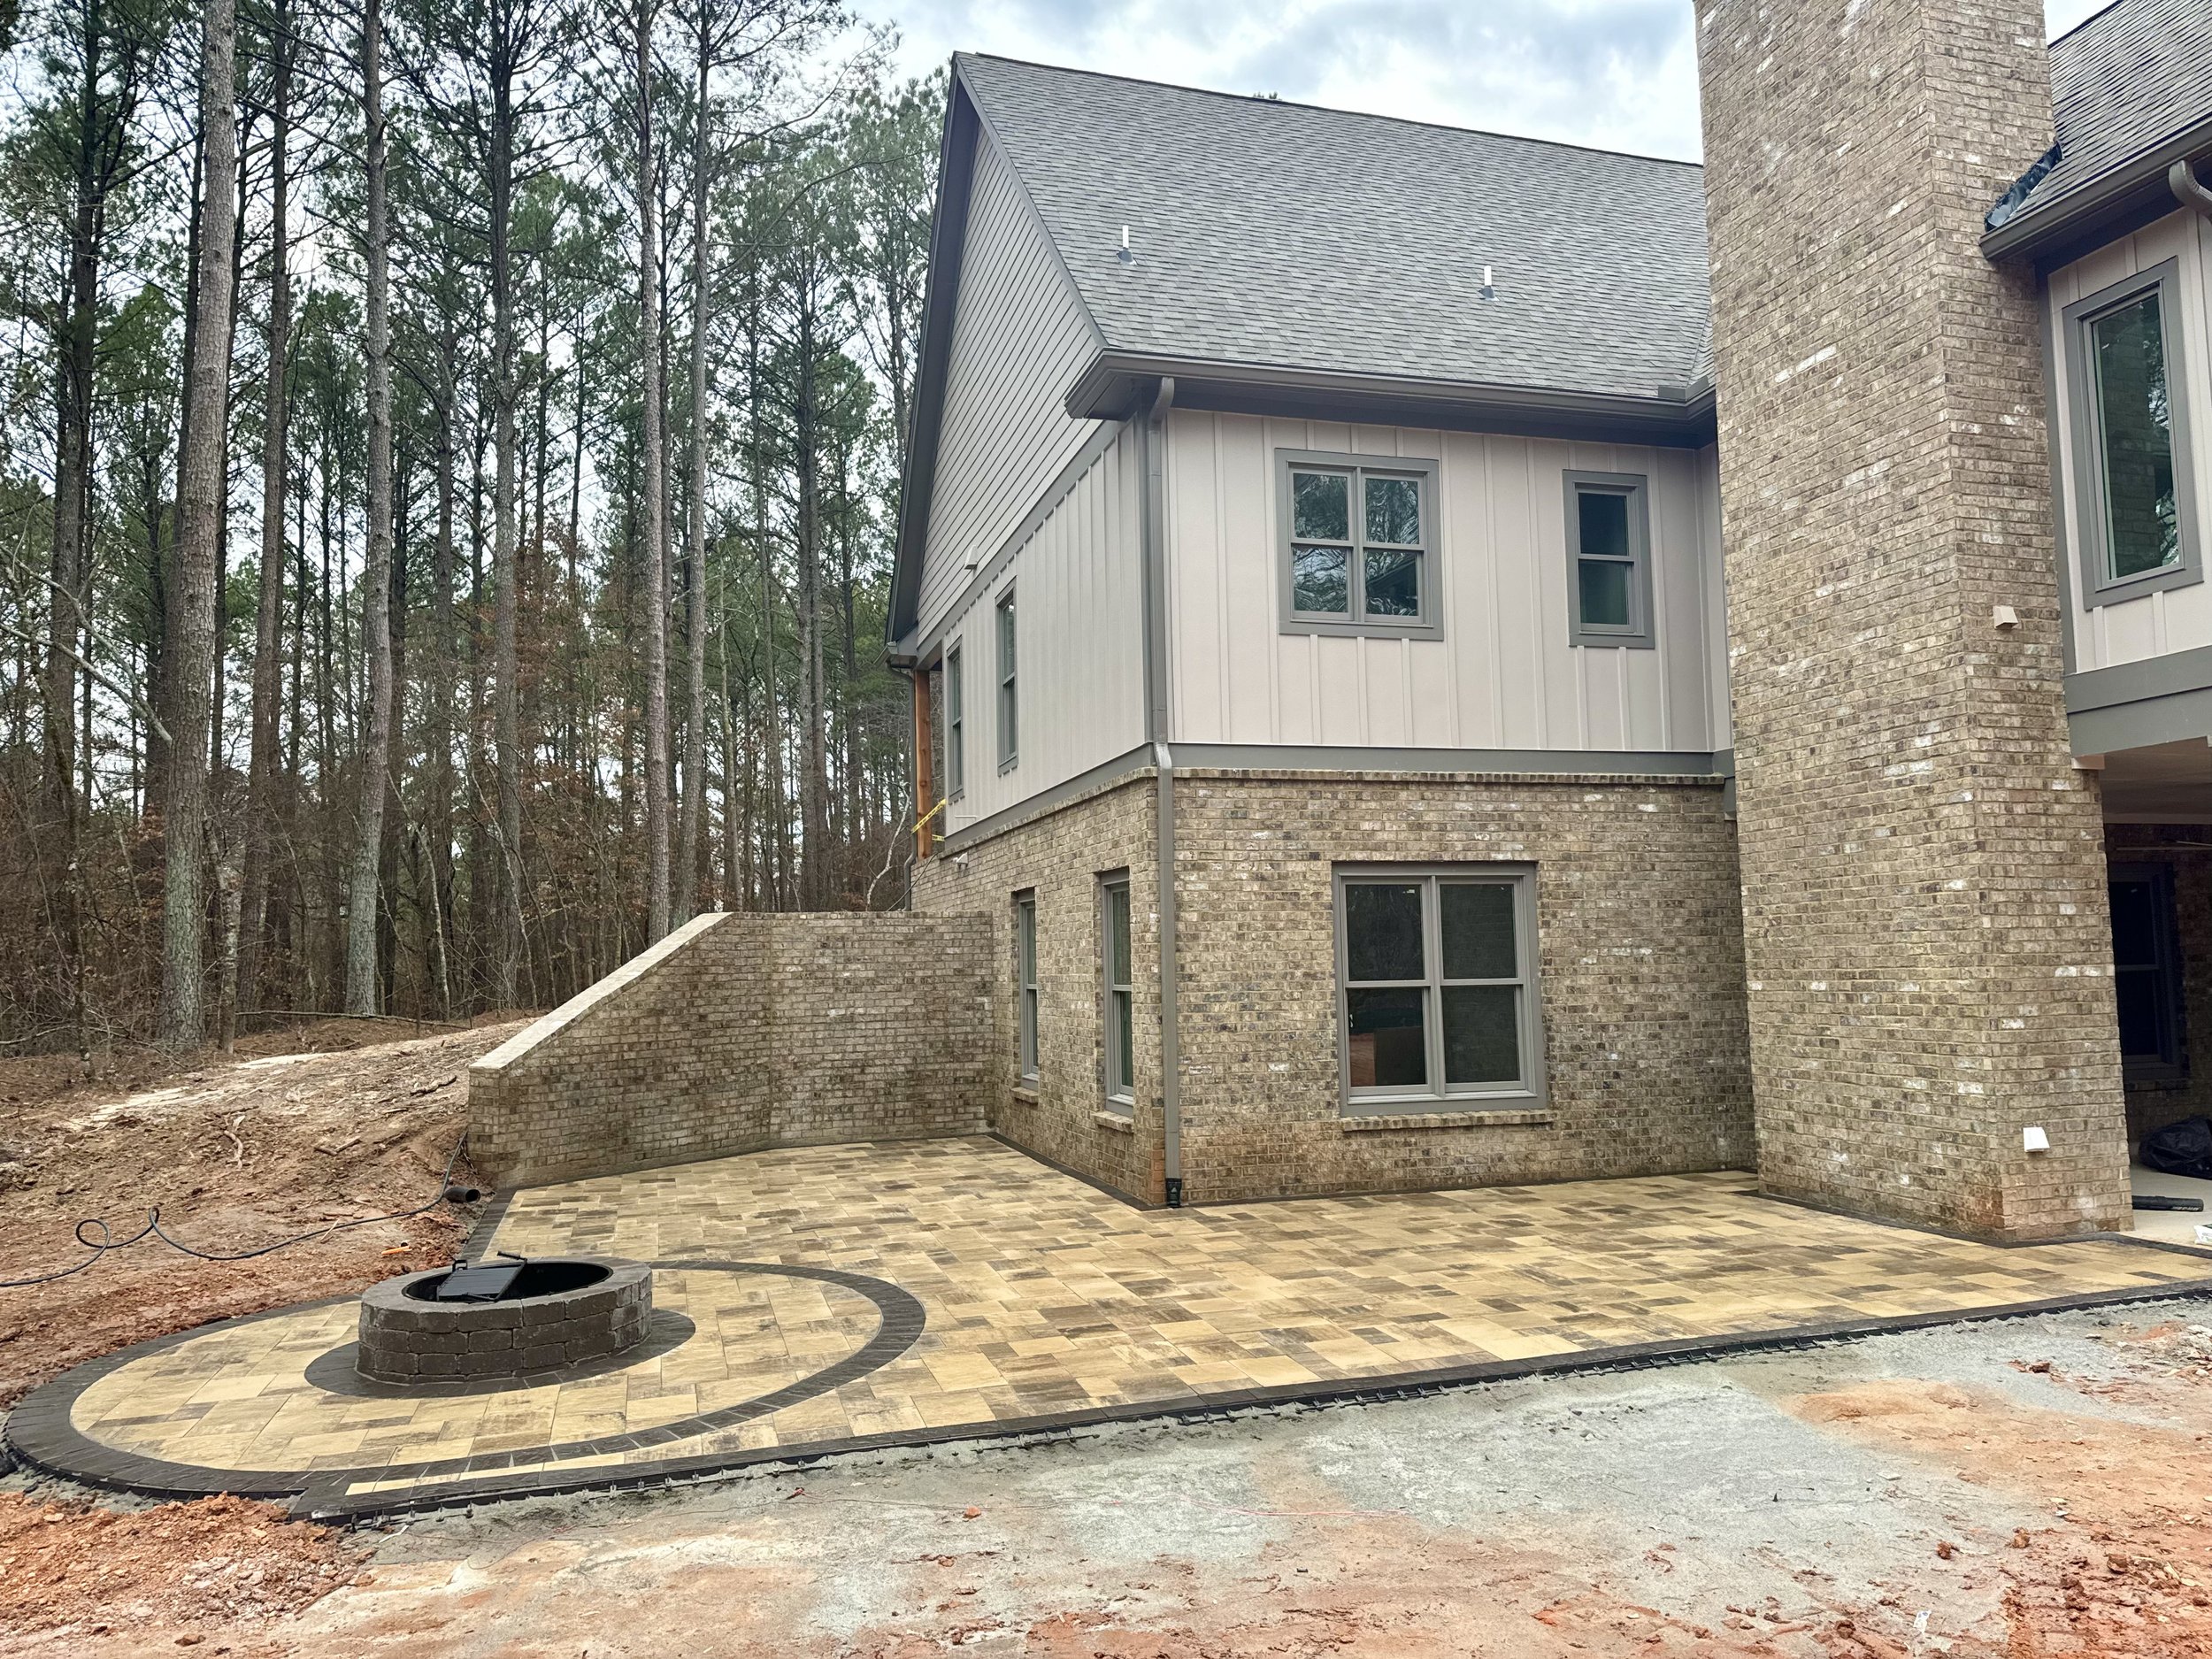
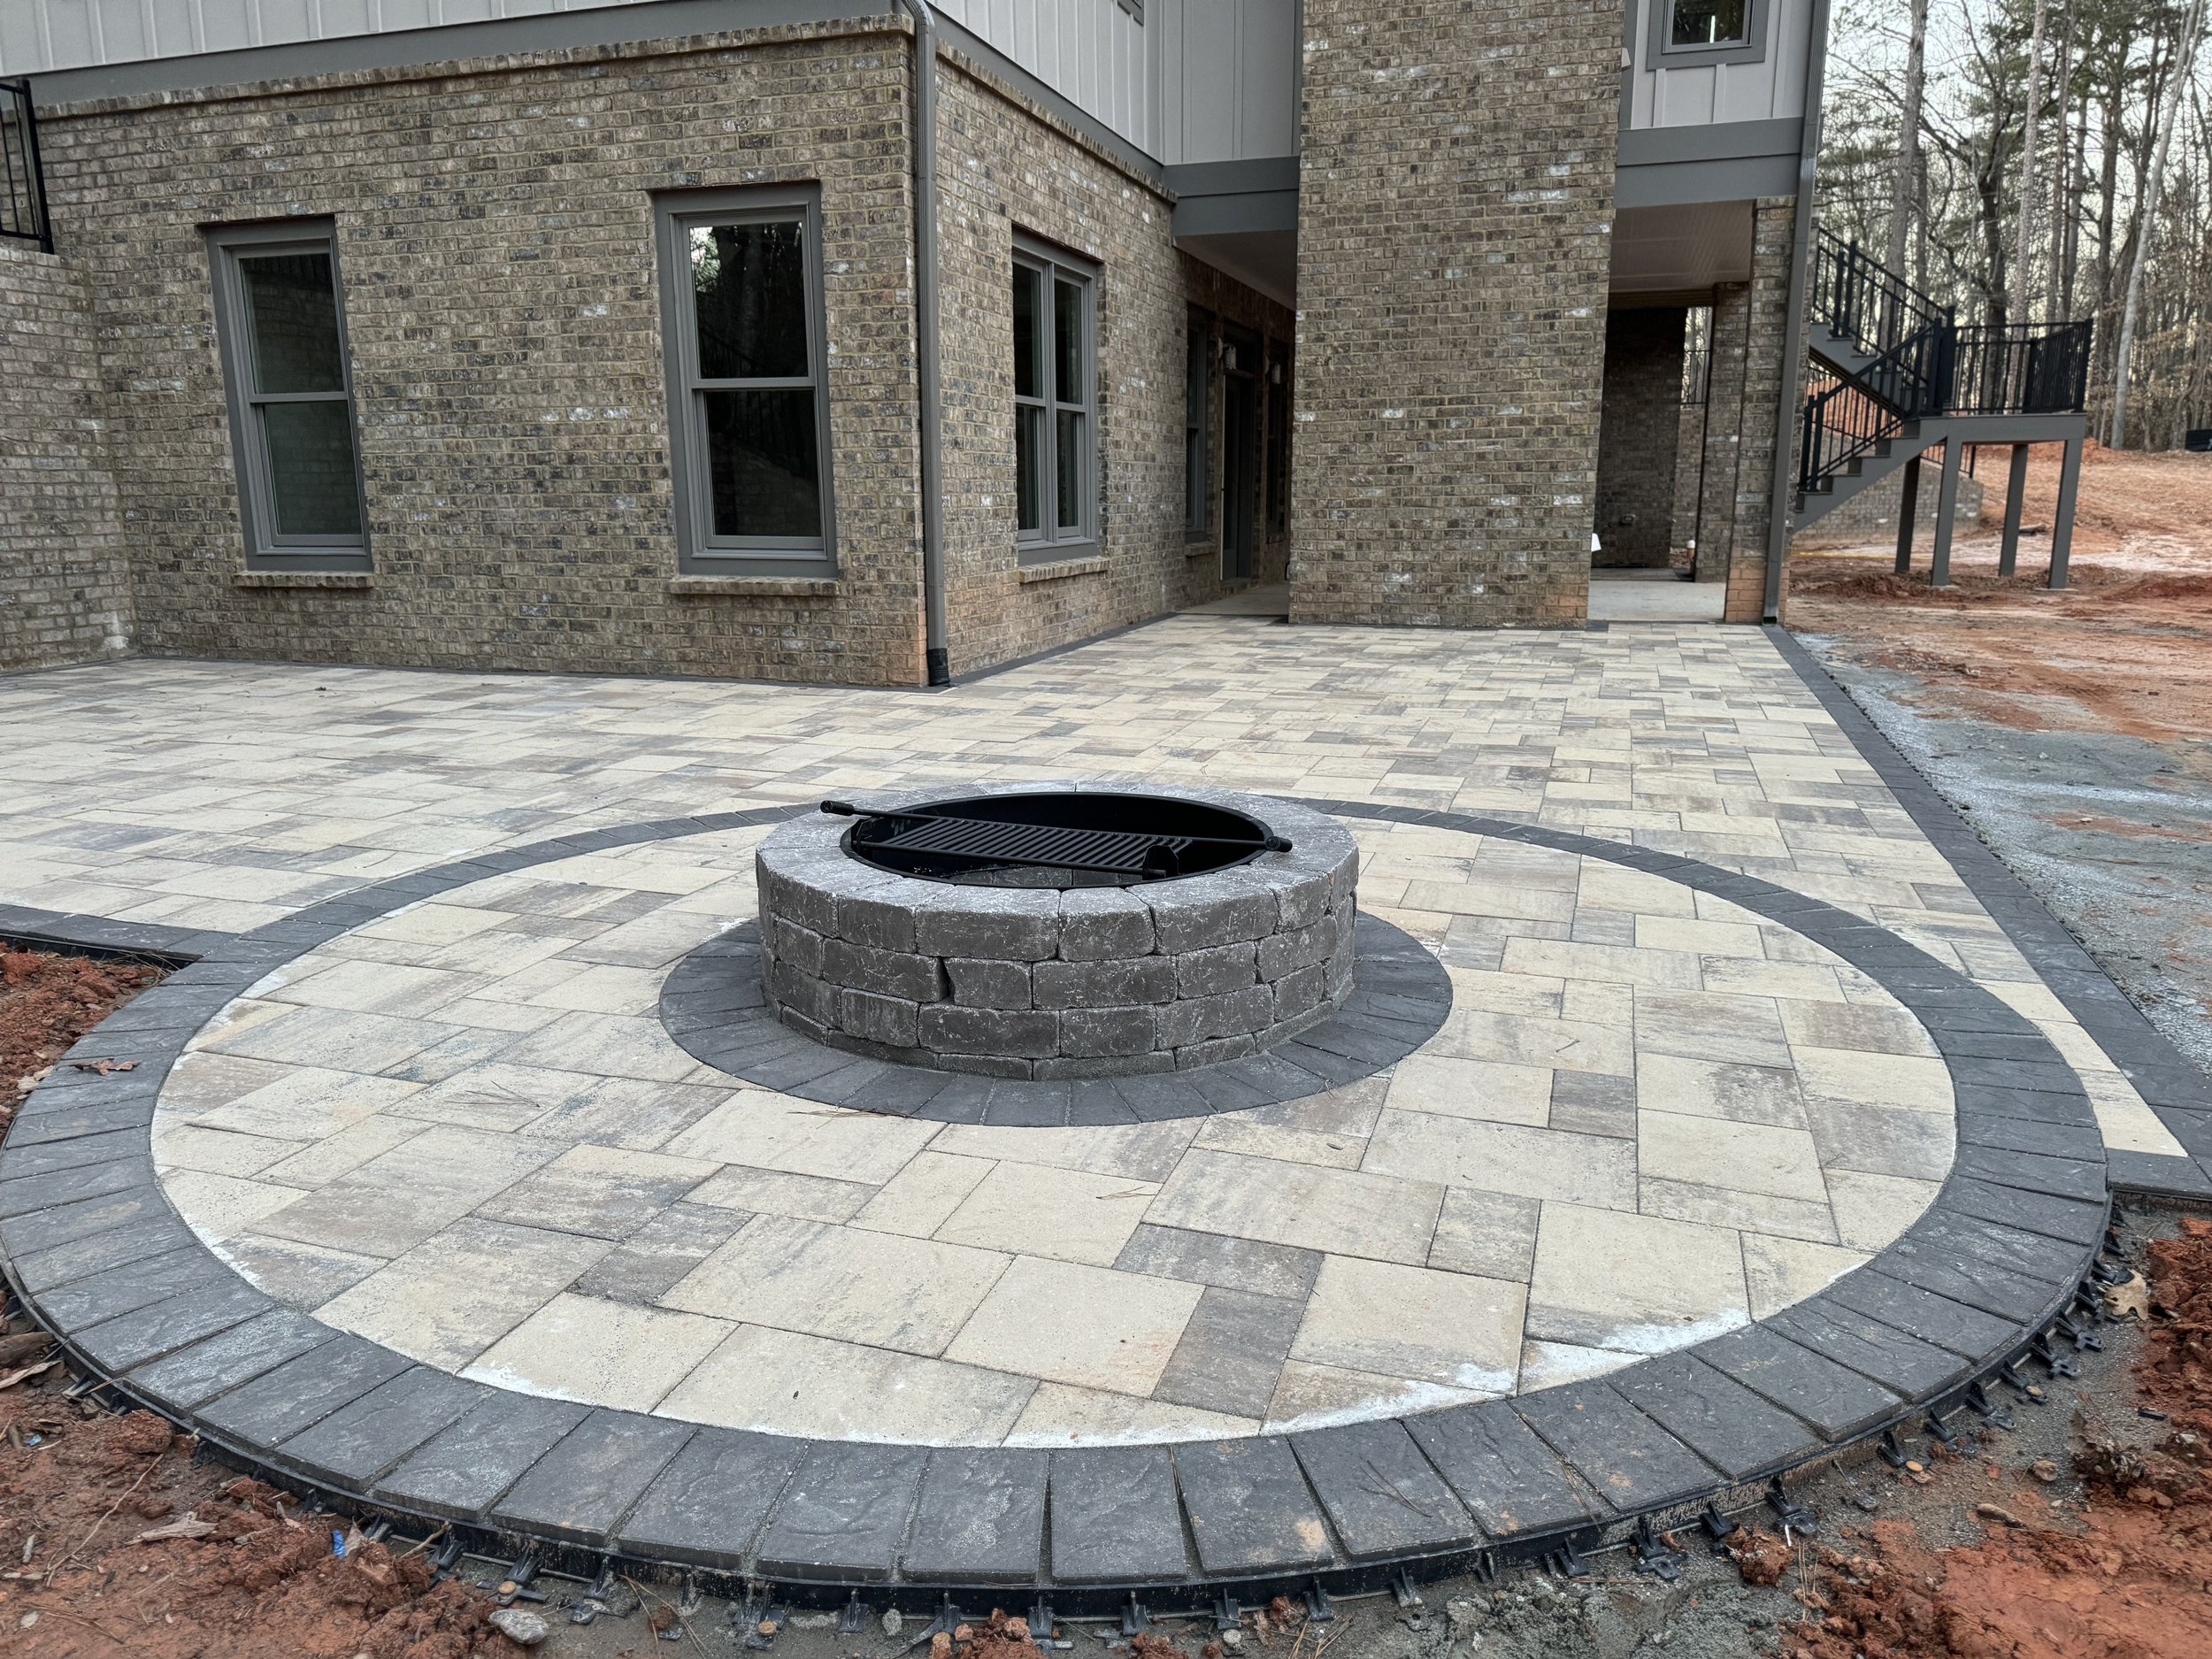
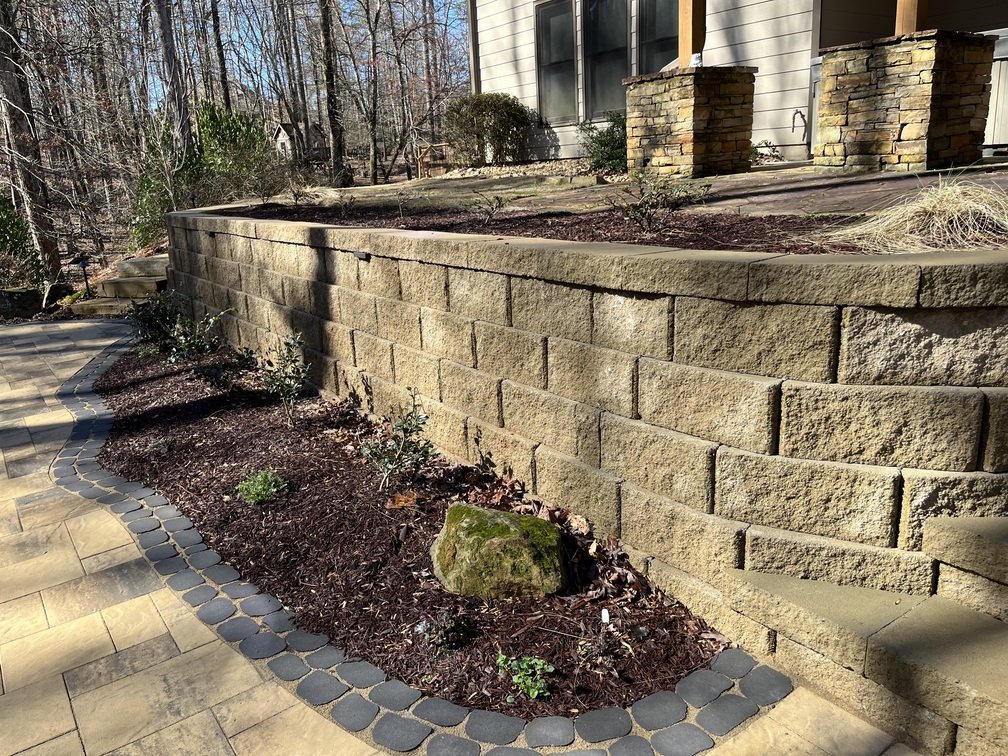
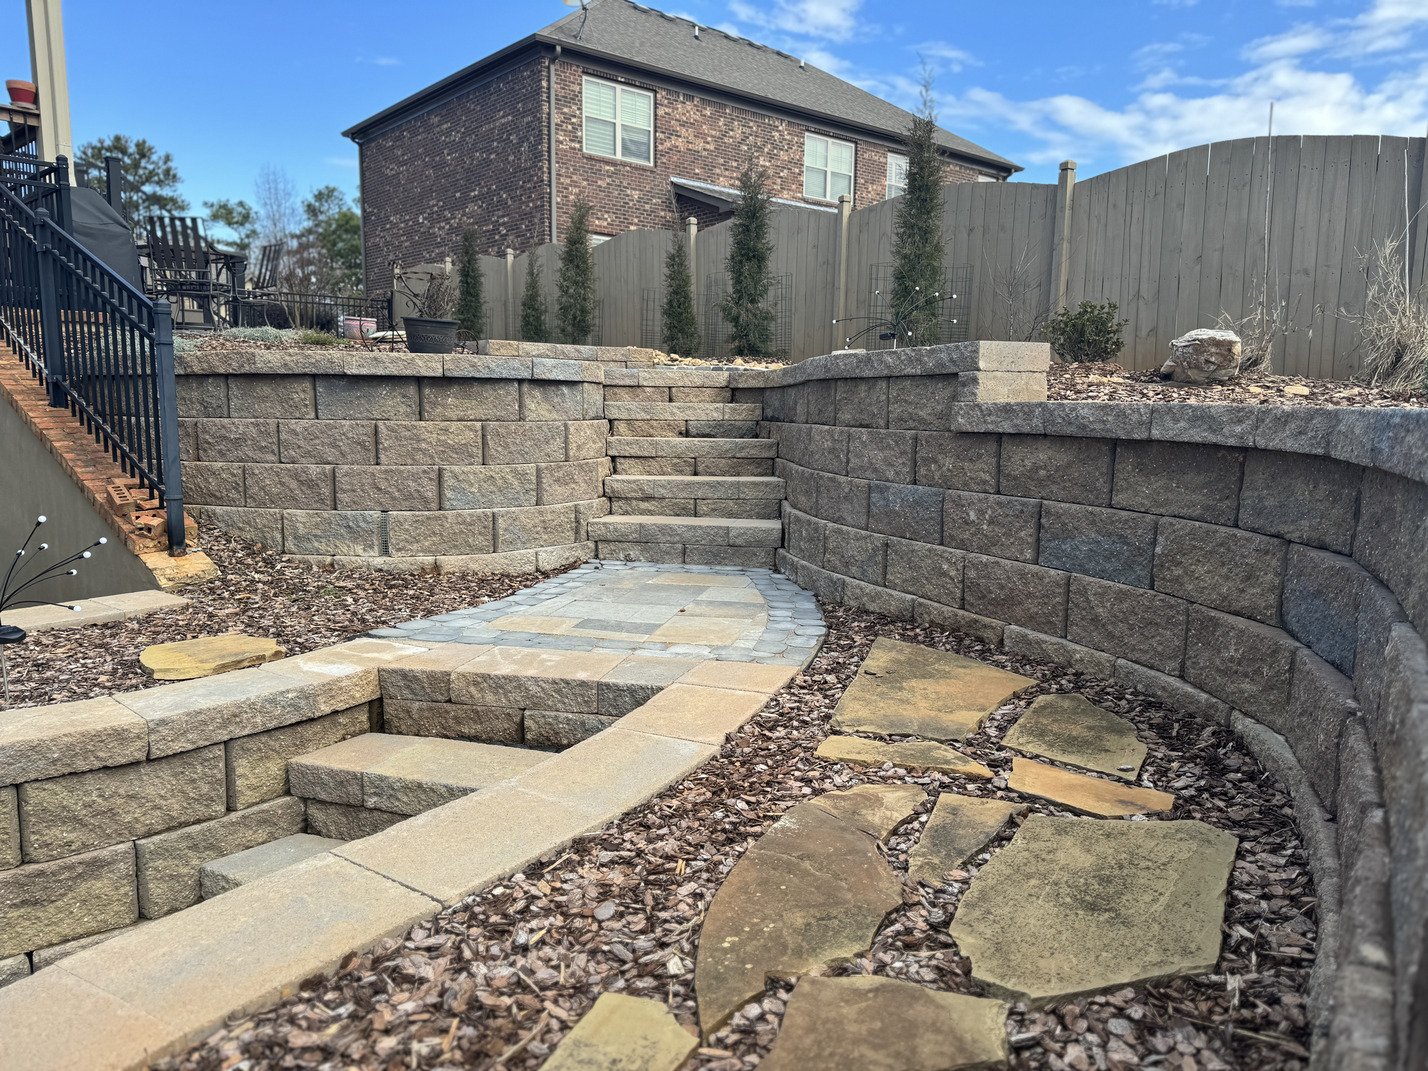
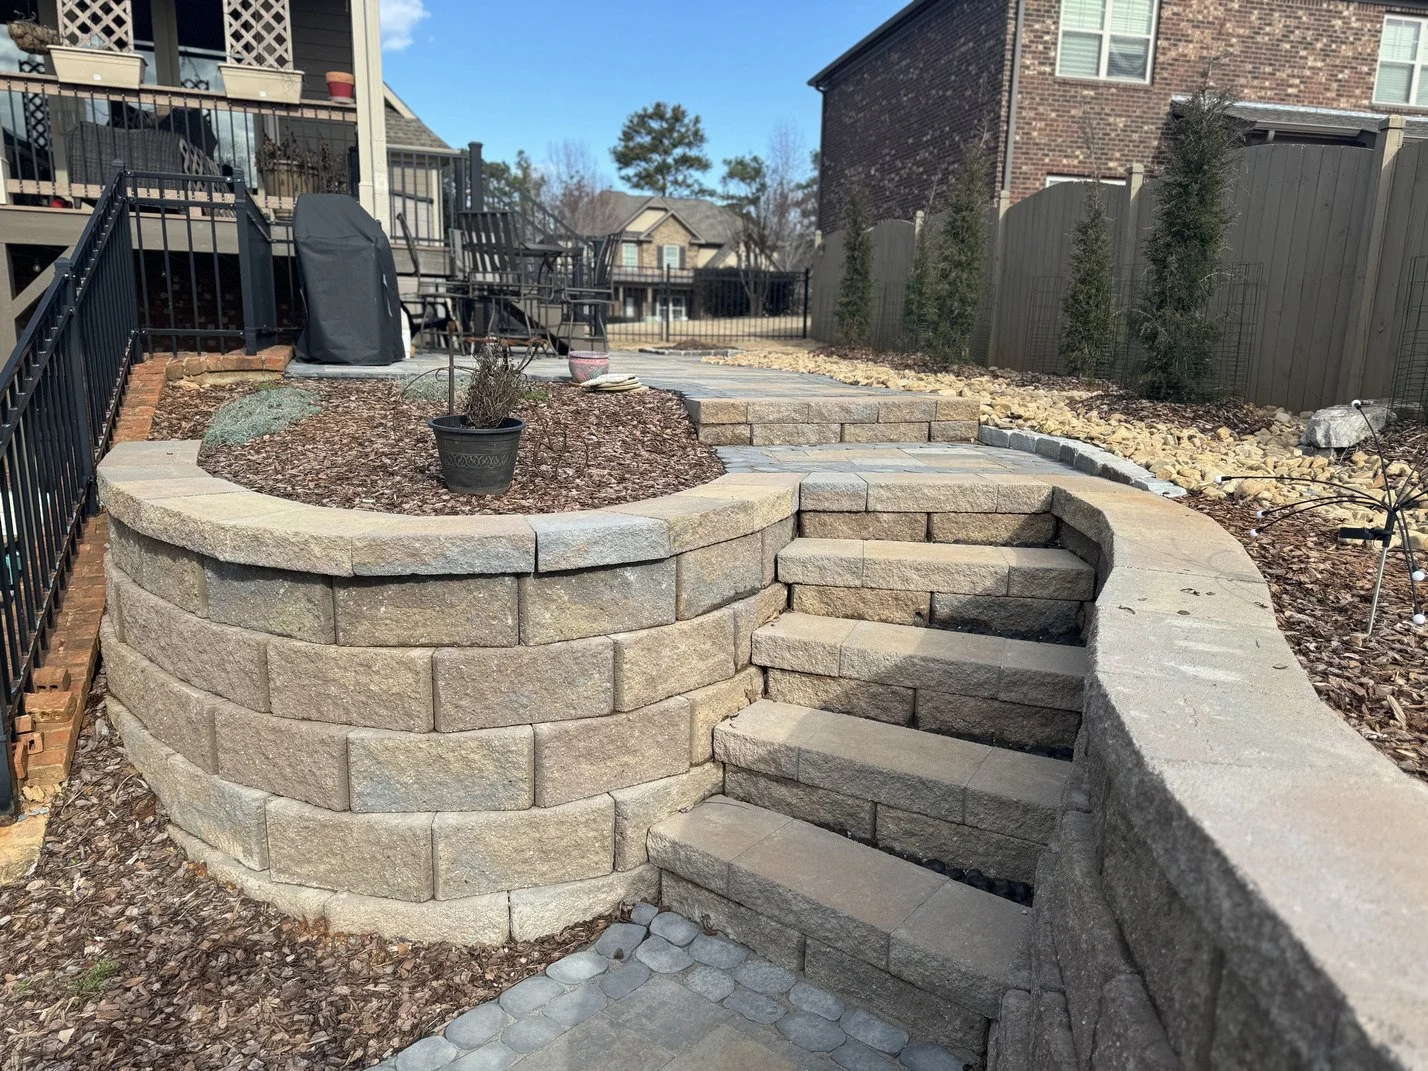
A well-built retaining wall is one of the most effective ways to stabilize your property while adding character to your outdoor living space. Expert retaining wall design combines structural integrity with style, creating a feature that not only holds back soil but also elevates the look of your yard. Whether crafted from stacked natural stone, concrete pavers, or durable retaining wall block, these installations manage runoff, prevent washouts, and define usable areas on sloped lots. They can even double as seating or create attractive planting beds, giving your yard dimension and charm.
By working with experienced retaining wall contractors, Gainesville homeowners get the peace of mind that comes from quality engineering and thoughtful craftsmanship. A carefully planned retaining wall construction project ensures your investment stands up to North Georgia’s varied weather while complementing your landscape’s overall design.
Our Retaining Wall Design and Installation Process
-
Every successful project begins with a clear understanding of your goals. We begin with an in-depth consultation, discussing your property’s layout, any erosion or drainage concerns, and the aesthetic you’d like to achieve. This step allows us to align the project with your needs and budget from the outset.
-
Next, we conduct a comprehensive site evaluation. Measurements, soil conditions, slope angles, and water flow patterns are carefully analyzed so we can anticipate potential challenges and plan solutions before construction begins.
-
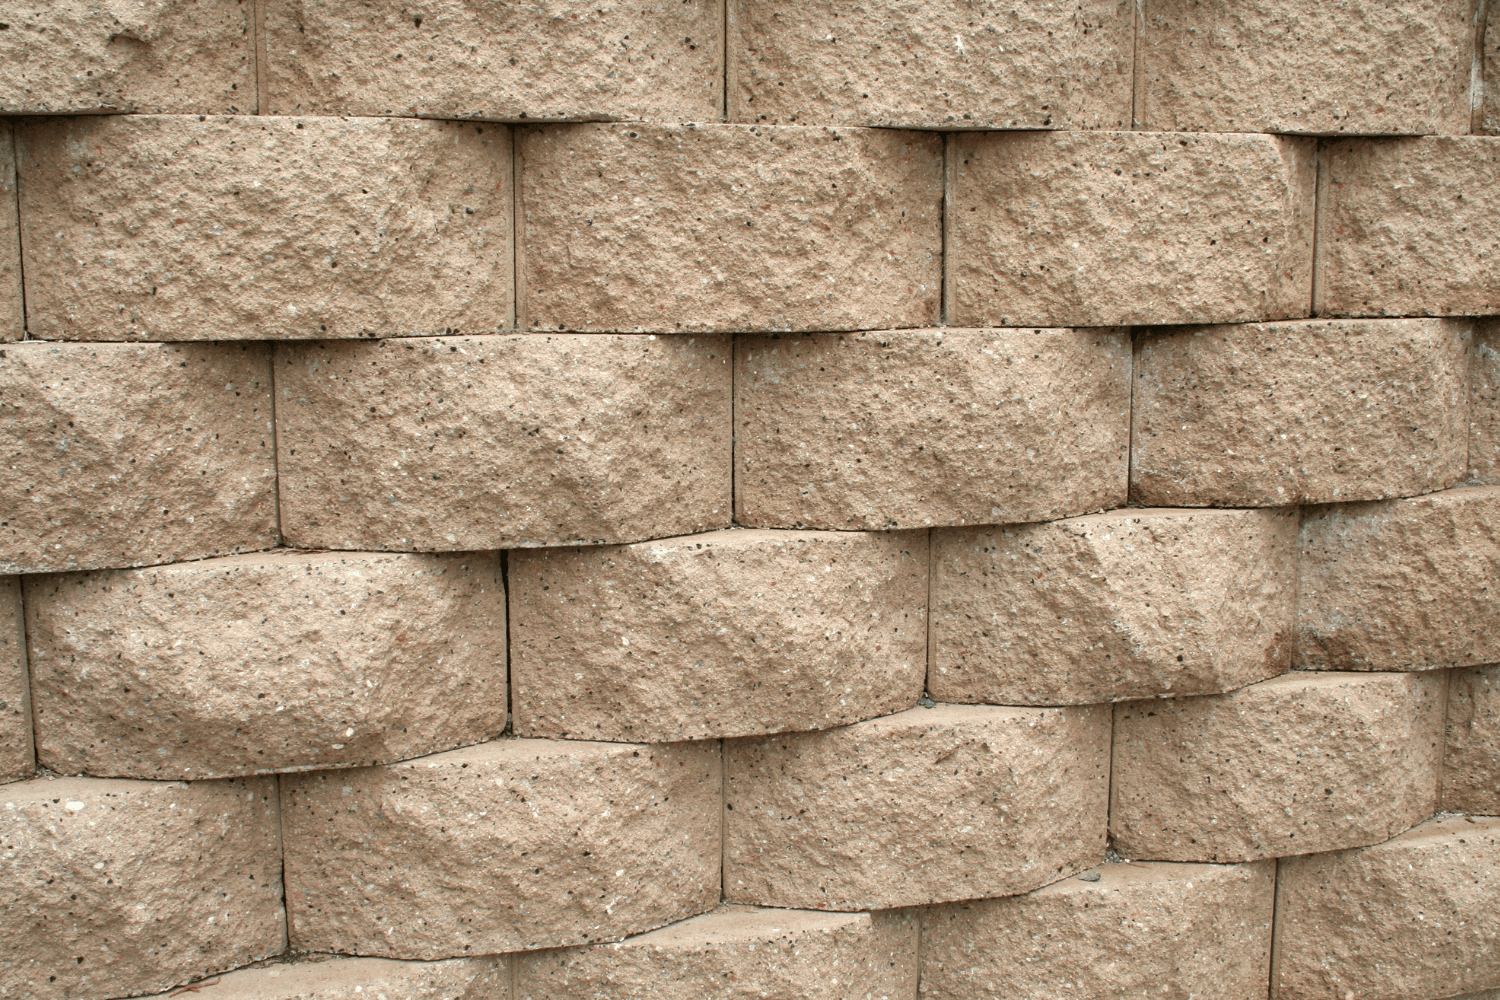
Using the information gathered, our team develops a custom retaining wall design tailored to your property. We’ll recommend the best materials — from natural stone to precast blocks — and create a layout that blends with your landscape while providing the strength needed for lasting stability.
-
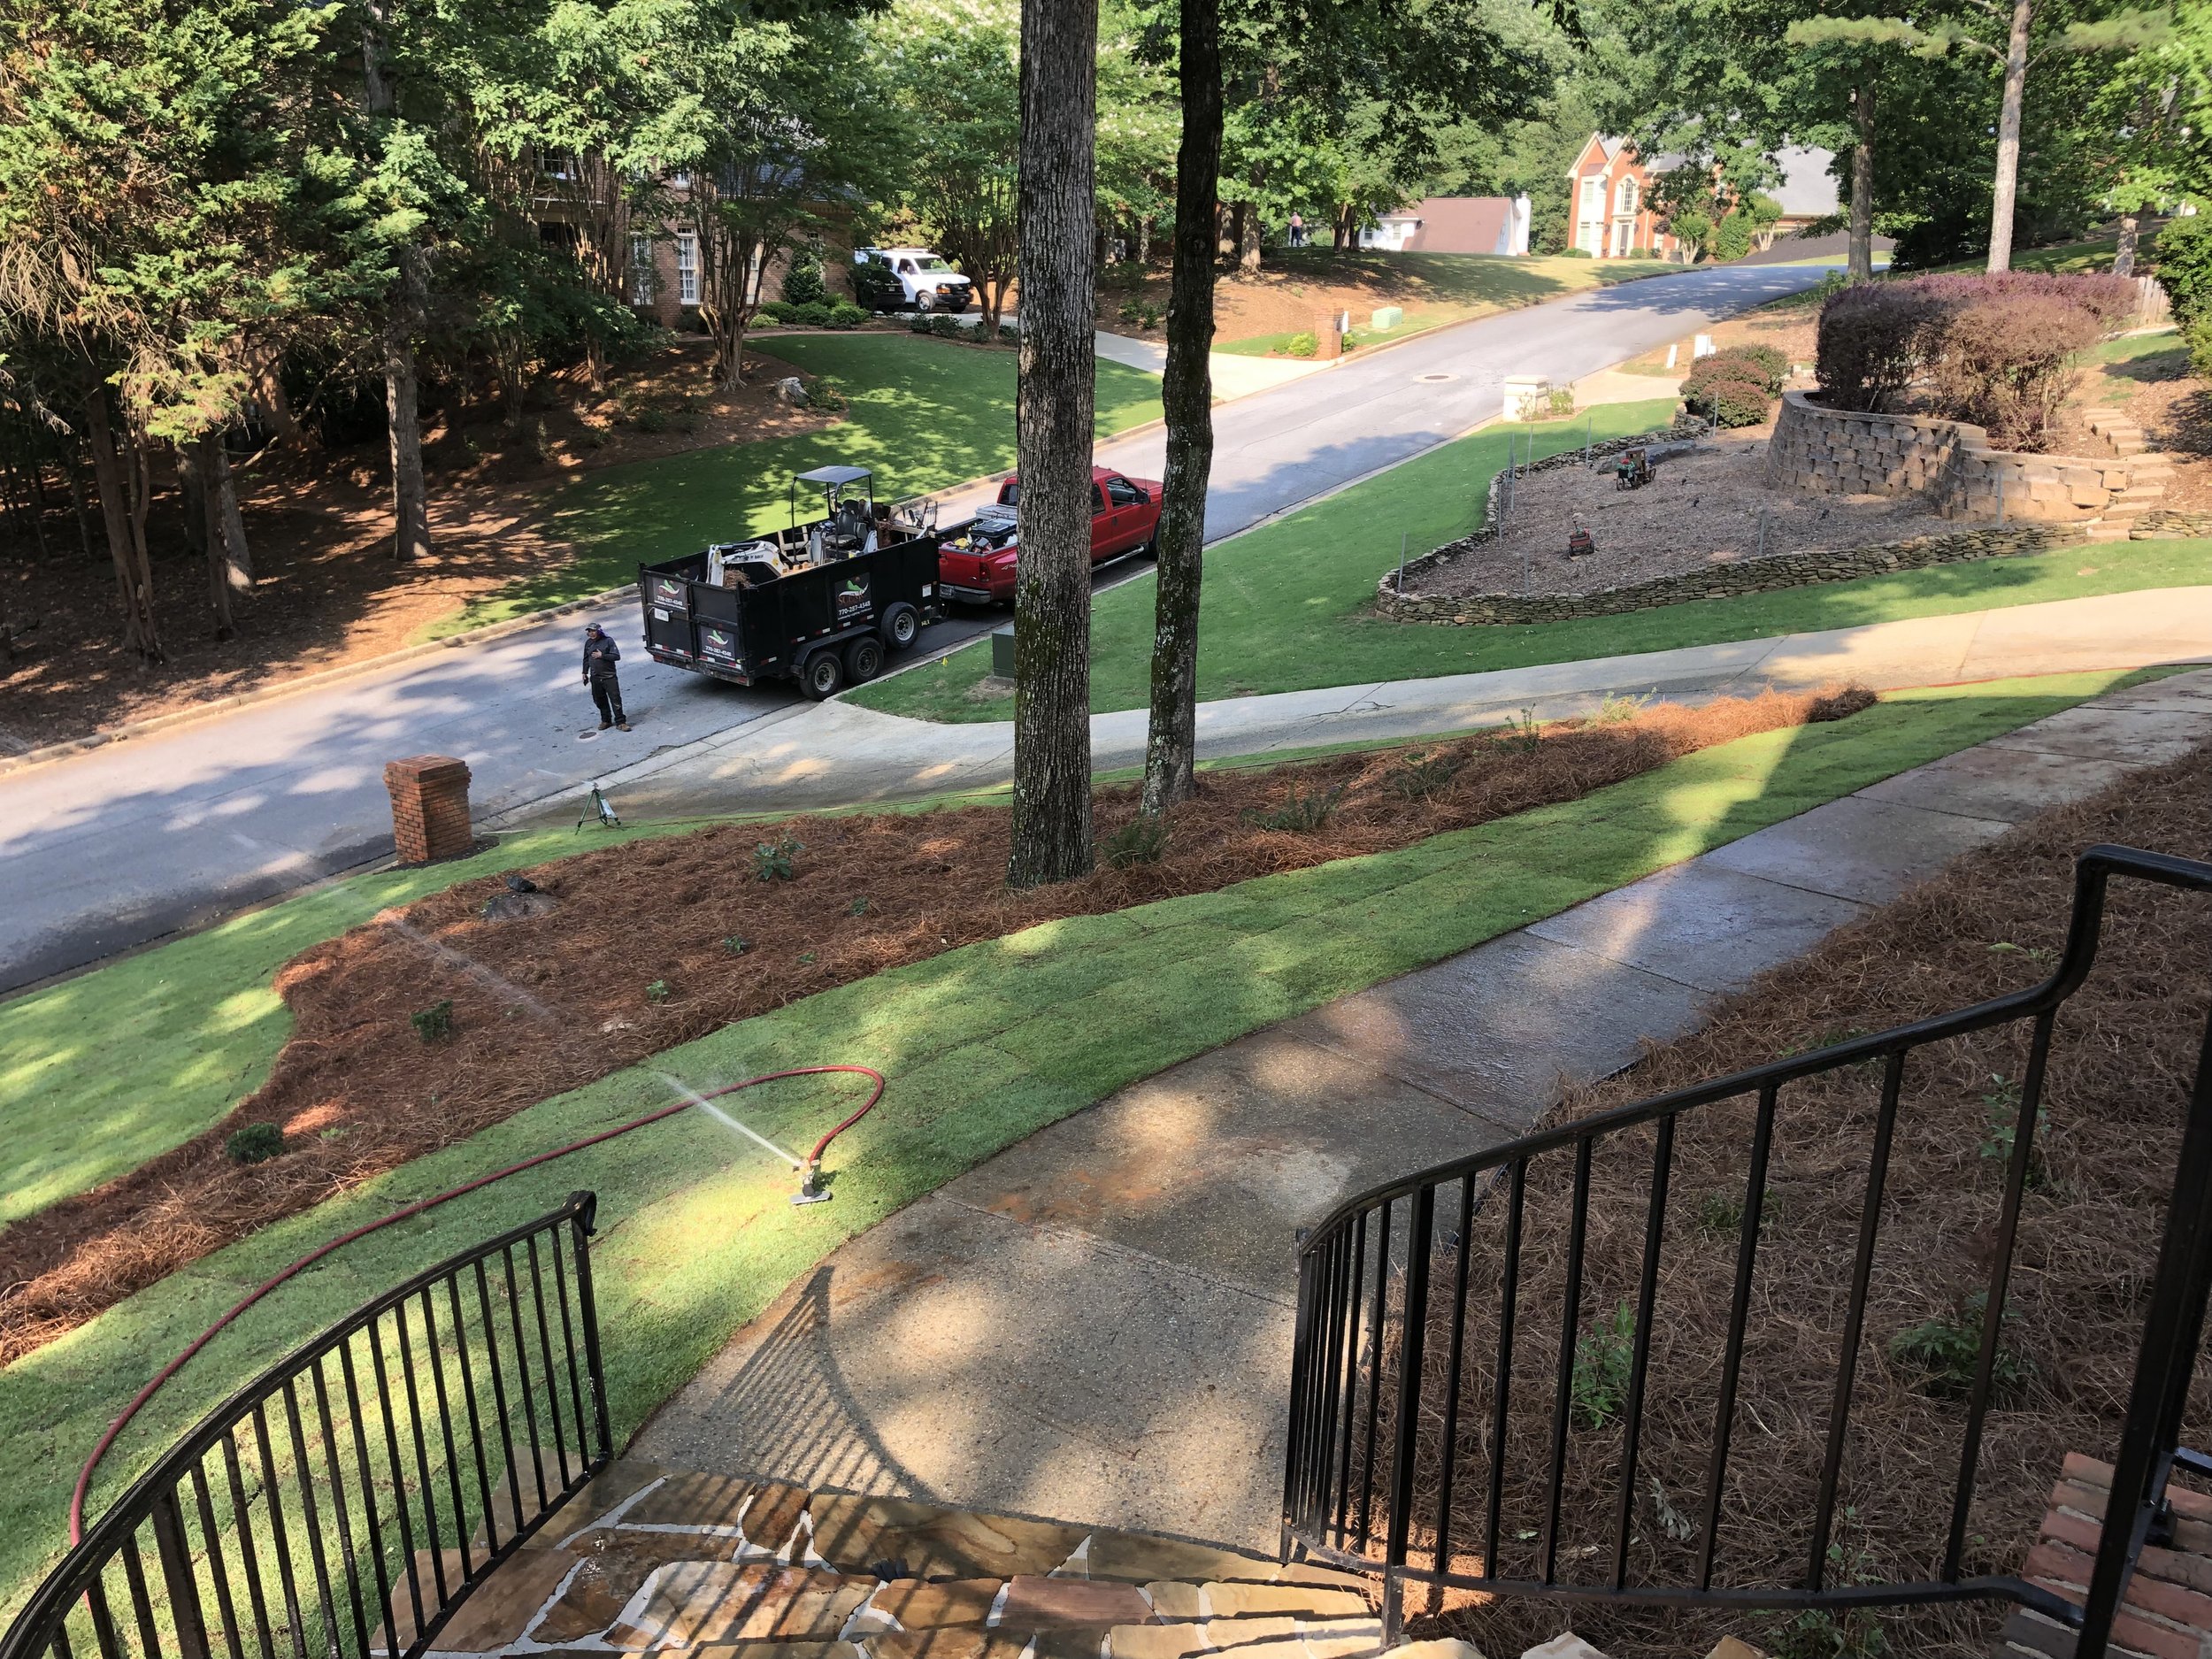
Once the design is approved, our skilled installers get to work. Depending on the wall’s size and purpose, the process may include excavating a trench, laying a solid base or footing, placing and leveling each retaining wall block, and adding proper drainage behind the structure. Attention to detail at every stage ensures your wall is as reliable as it is attractive.
Why Choose Rooted Landscape Management for Retaining Wall Installation
Building a retaining wall isn’t just about stacking stone; it’s about protecting your property and creating an appealing outdoor environment. Our team has completed countless retaining wall installations throughout Gainesville, refining techniques and material selections to suit the area’s clay-rich soil and rainfall patterns. We approach each project with a balance of structural expertise and creative design, delivering walls that perform their job while enhancing curb appeal.
When you hire experienced professionals, you’re investing in more than erosion control — you’re adding value and longevity to your entire landscape. We handle every phase of retaining wall construction with precision, so you can enjoy a space that’s functional and visually striking.
Our Reviews
How We Build Our Belgard Retaining Walls
Our Service Area in Georgia
Gainesville, Cornelia, Clarksville, Cleveland, Lula, Jefferson, Dawsonville, Dahlonega, Buford, Suwanee, Cumming, Duluth, Alpharetta, Commerce

Schedule a Free Consultation
Protect your yard from erosion and unlock the full potential of your outdoor space with a custom retaining wall. Our Gainesville team specializes in designing and building durable, attractive walls that fit your property’s unique contours. Call today to schedule a free consultation and discover how our expertise in retaining wall design and installation can transform your landscape.
-
What is a retaining wall?
A retaining wall is a structure designed to hold back soil and prevent erosion or collapse. It is typically used on slopes or uneven terrain.
Why would I need a retaining wall?
Retaining walls stabilize slopes, prevent soil erosion, create level areas for landscaping, and enhance the visual appeal of a property.
What materials are generally used for retaining walls?
Common materials include concrete blocks, natural stone, brick, timber, and poured concrete.
How do I know if I need a retaining wall?
A retaining wall may be necessary if you have a sloped area prone to erosion, uneven ground, or a need to create level spaces. A professional assessment can give a definitive answer.
What factors affect the design of a retaining wall?
Key factors include soil type, wall height, slope gradient, drainage needs, and the purpose of the wall.
What are the benefits of a professionally designed retaining wall?
Professional design ensures structural integrity, proper drainage, and compliance with local building codes, which enhances durability and functionality.
How do you determine the appropriate height for a retaining wall?
The height is determined based on the amount of soil to be retained, the slope of the land, and the specific requirements of your project.
What is the normal lifespan of a retaining wall?
The lifespan varies with materials used and maintenance, but well-constructed walls can last 30 to 50 years or more.
Can you install retaining walls on a steep slope?
Yes, retaining walls are ideal for managing steep slopes and can be designed to handle various gradient challenges.
How do you handle drainage with retaining walls?
Proper drainage is crucial. To prevent water buildup behind the wall, we include drainage solutions such as gravel backfill, perforated pipes, and weep holes.
What are the common issues with retaining walls, and how are they addressed?
Common issues include water damage, shifting, and structural failure. These are addressed through proper design, material selection, and maintenance.
How do you choose the right material for a retaining wall?
The material choice depends on aesthetic preference, structural needs, and budget. We help you select the best option for your specific requirements.
Do retaining walls require a permit?
Yes, most retaining walls require a permit, especially if they exceed a certain height. We can assist with obtaining the necessary permits.
How long does it take to install a retaining wall?
Installation time depends on the wall's size, material, and complexity, but typical projects take a few days to several weeks.
Can a retaining wall be combined with other landscape features?
Retaining walls can be integrated with features like steps, planters, and seating areas to enhance their functionality and aesthetics.
What is the cost of retaining wall installation?
Costs vary based on material, height, length, and complexity. Contact us for a detailed estimate tailored to your project.
How do you ensure the stability of a retaining wall?
Stability is ensured through proper foundation preparation, material selection, design, and installation techniques that account for soil pressure and drainage.
Can you install a retaining wall in an area with existing landscaping?
Yes, we can work around existing landscaping and integrate the retaining wall seamlessly into your current design.
What maintenance is required for retaining walls?
Regular maintenance includes inspecting cracks or shifting, ensuring proper drainage, and addressing erosion issues.
How do you handle drainage behind a retaining wall?
We use a combination of gravel backfill, drainage pipes, and weep holes to manage and direct water away from the wall.
Are there any design options for decorative retaining walls?
Yes, retaining walls can be customized with various materials, colors, and patterns to complement your landscape design.
How do retaining walls help with erosion control?
Retaining walls prevent soil movement and erosion by stabilizing slopes and redirecting water flow.
Can retaining walls be used for terracing?
Retaining walls often create terraced levels on sloped terrain, adding visual interest and functional space.
What types of retaining walls are best for residential properties?
Depending on aesthetic preferences and functional needs, options include segmental block walls, natural stone walls, and timber walls.
How do you address soil pressure on retaining walls?
We design the wall to withstand soil pressure through proper engineering, including reinforcement and appropriate material choices.
Can retaining walls be used to create garden beds or seating areas?
Yes, retaining walls can be designed to incorporate garden beds or seating areas, enhancing functionality and aesthetics.
What should I do if my retaining wall shows signs of damage?
Contact us for an inspection. We can assess the damage and recommend repairs or reinforcement as needed.
Can retaining walls be used for noise reduction or privacy?
Yes, taller retaining walls can provide privacy and help reduce noise by acting as a barrier between your property and external sources.
How do you handle utility lines or underground structures during installation?
We conduct a thorough site assessment to locate and avoid interfering with utility lines or underground structures.
Can retaining walls be installed in areas with poor soil conditions?
We use engineering techniques and appropriate materials to address poor soil conditions and ensure wall stability.
How do you integrate retaining walls into a landscape design?
We consider the overall landscape design, including existing features and planned additions, to ensure the retaining wall complements the project.
What are the advantages of modular block retaining walls?
Modular block walls are versatile, durable, and easily customized with different styles and colors.
How do you handle vegetation around retaining walls?
We plan for appropriate spacing and maintenance of vegetation to prevent overgrowth that could impact the wall's stability.
Can retaining walls be used to enhance the aesthetic value of a property?
Yes, retaining walls can be designed to add visual appeal through various materials, textures, and landscaping elements.
What are the common types of retaining walls used in residential settings?
Common types include gravity walls, cantilever walls, anchored walls, and reinforced earth walls, each suited to different applications.
How do you ensure the retaining wall design complies with local building codes?
We are familiar with local codes and regulations and ensure our designs meet all required standards and specifications.
Can you build retaining walls with environmentally friendly materials?
We offer options like recycled materials and eco-friendly blocks to support sustainable landscaping practices.
How do you address potential settlement issues with retaining walls?
We design and construct retaining walls with proper foundation support and drainage to minimize settlement issues.
Can retaining walls be designed to include built-in lighting?
We can integrate lighting into retaining walls to enhance appearance and functionality, especially for evening use.
What is the role of reinforcement in retaining wall construction?
Reinforcement, such as steel bars or geo-grid materials, helps strengthen the wall and improve its ability to handle soil pressure and stability.
How do you manage water runoff from retaining walls?
We incorporate drainage solutions like drainage pipes and gravel to manage water runoff and prevent buildup behind the wall.
Can retaining walls be customized for unique design elements?
We can create custom designs with specific materials, shapes, and features to match your unique vision.
How do you handle installation challenges in difficult terrain?
We use specialized techniques and equipment to address challenges like uneven terrain or restricted access areas.
What are the benefits of using natural stone for retaining walls?
Natural stone offers durability, aesthetic appeal, and a timeless look, blending seamlessly with natural landscapes.
Can you build retaining walls that are structurally safe and aesthetically pleasing?
We ensure that all retaining walls are structurally sound and visually appealing through careful design and quality construction.
How do you assess the need for engineering consultation in retaining wall projects?
We evaluate the project's complexity and height to determine if an engineering consultation is required to ensure structural integrity.
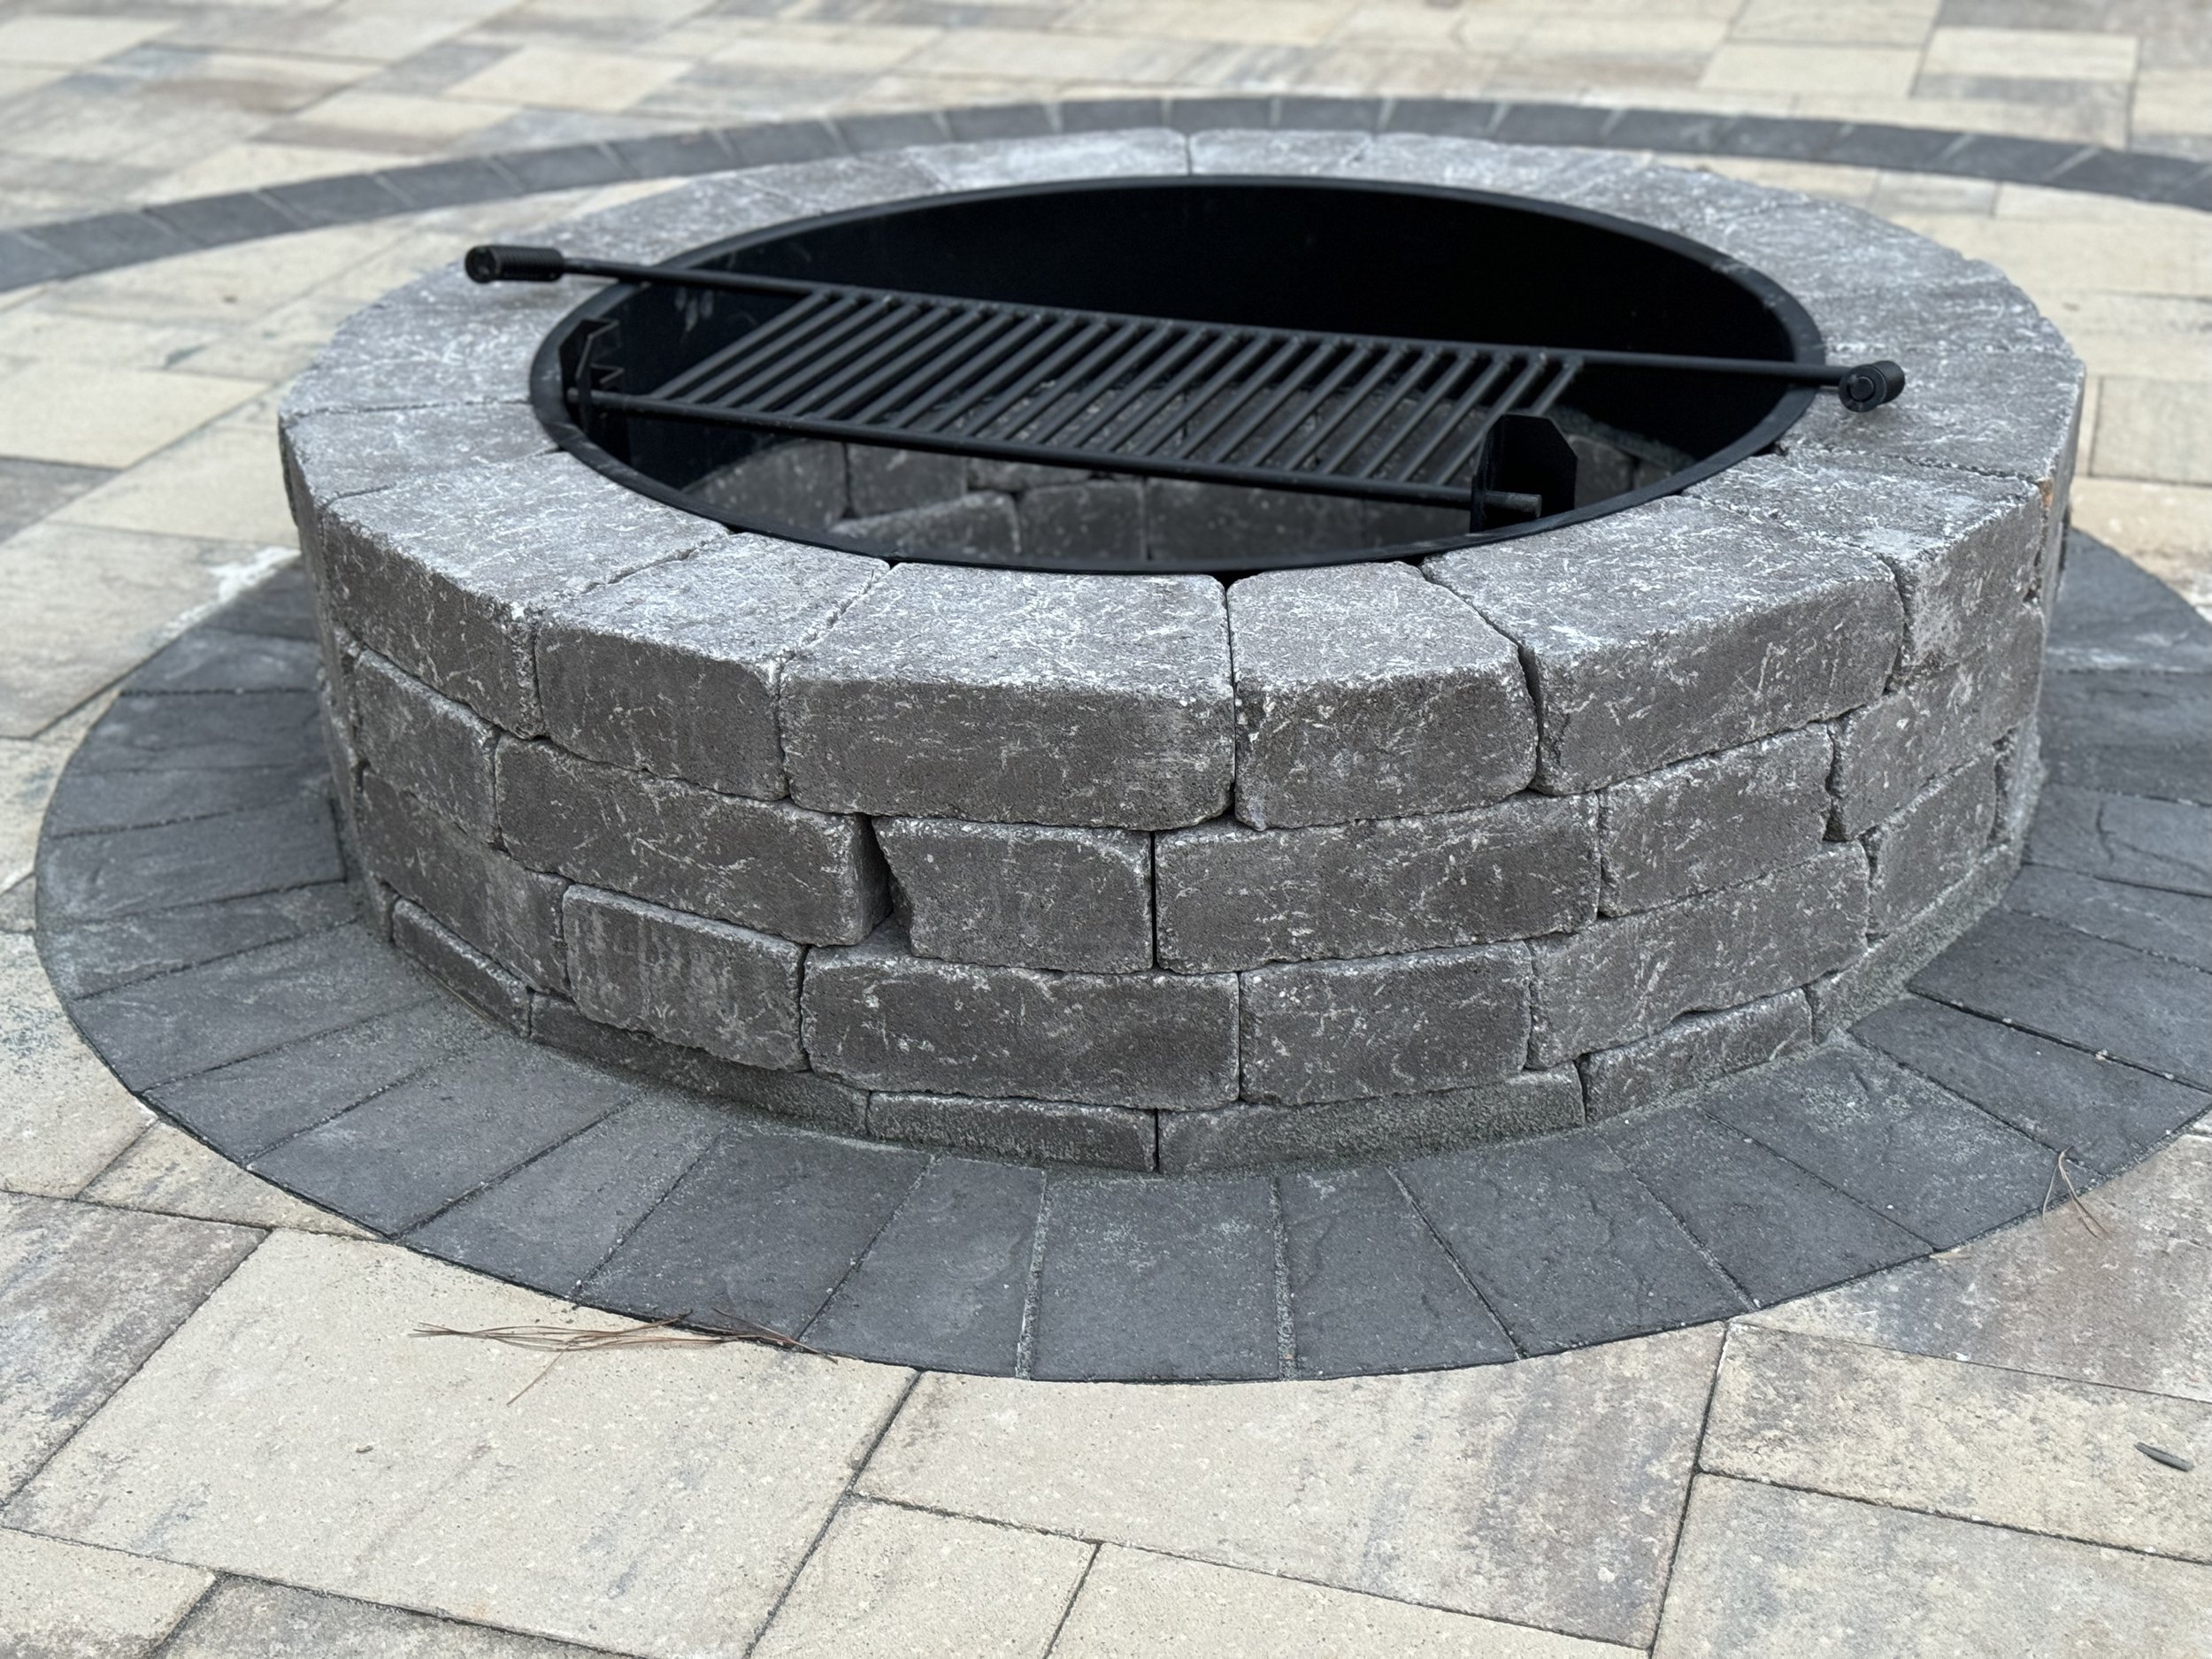
Can retaining walls create outdoor living spaces, like patios or fire pits?
Yes, retaining walls can be designed to create functional outdoor living spaces, integrating features like patios and fire pits.
What are the key factors in maintaining a retaining wall?
Key factors include regular inspections, proper drainage maintenance, promptly addressing any cracks or damage, and managing vegetation.
How do you handle warranty and repair services for retaining walls?
We provide warranties on our work and offer repair services for any issues that arise after installation.
How can I start a retaining wall project with Rooted Landscape Management?
Reach us by phone, email, or our website to schedule a consultation, discuss your needs, and receive a detailed estimate for your retaining wall project.